
This article walks through how to add users in BaseManager and assign access to controllers and sites using the Admin section, so teams can manage systems without sharing logins.
Adding a user through AppManager Admin
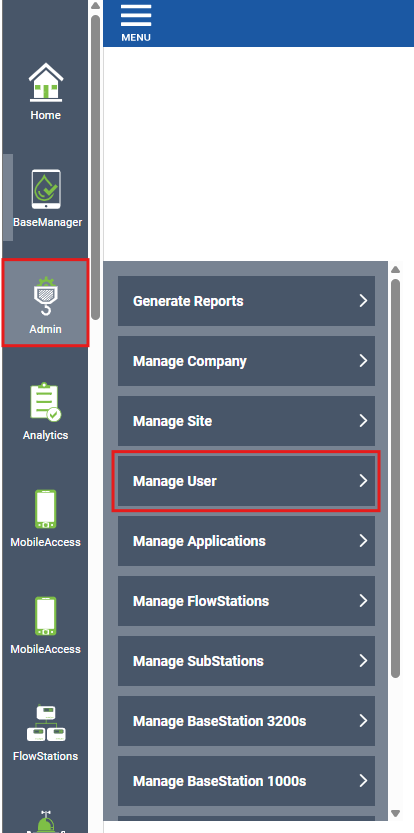
- Select Admin in the AppManager side bar, then select Manage User.
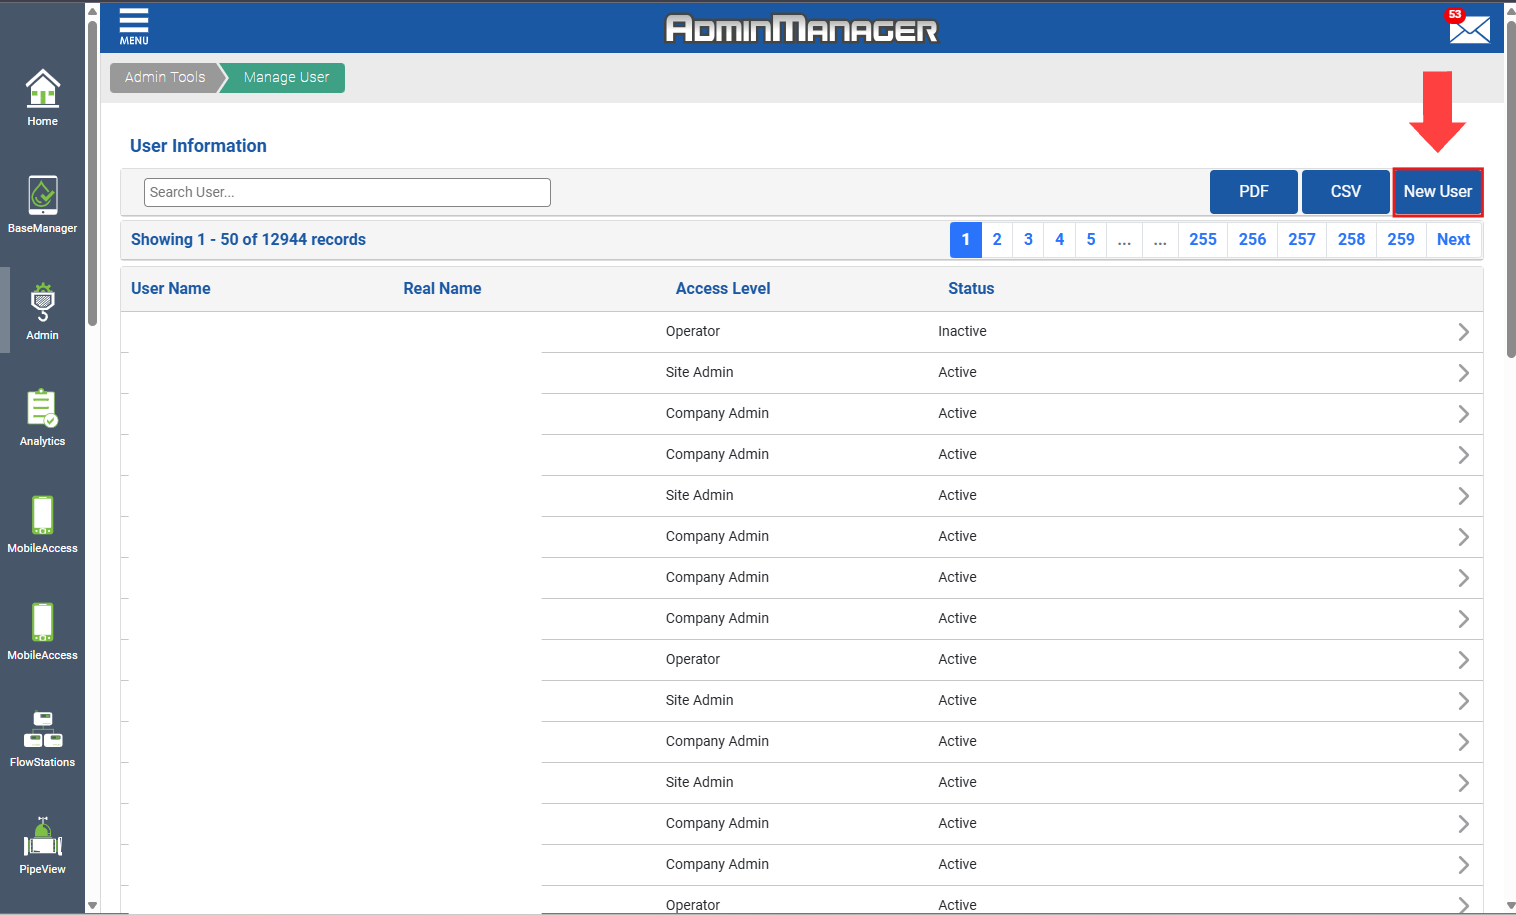
- After selecting Manage User, then select New User.
- A window will open from the right side requesting for the required information.
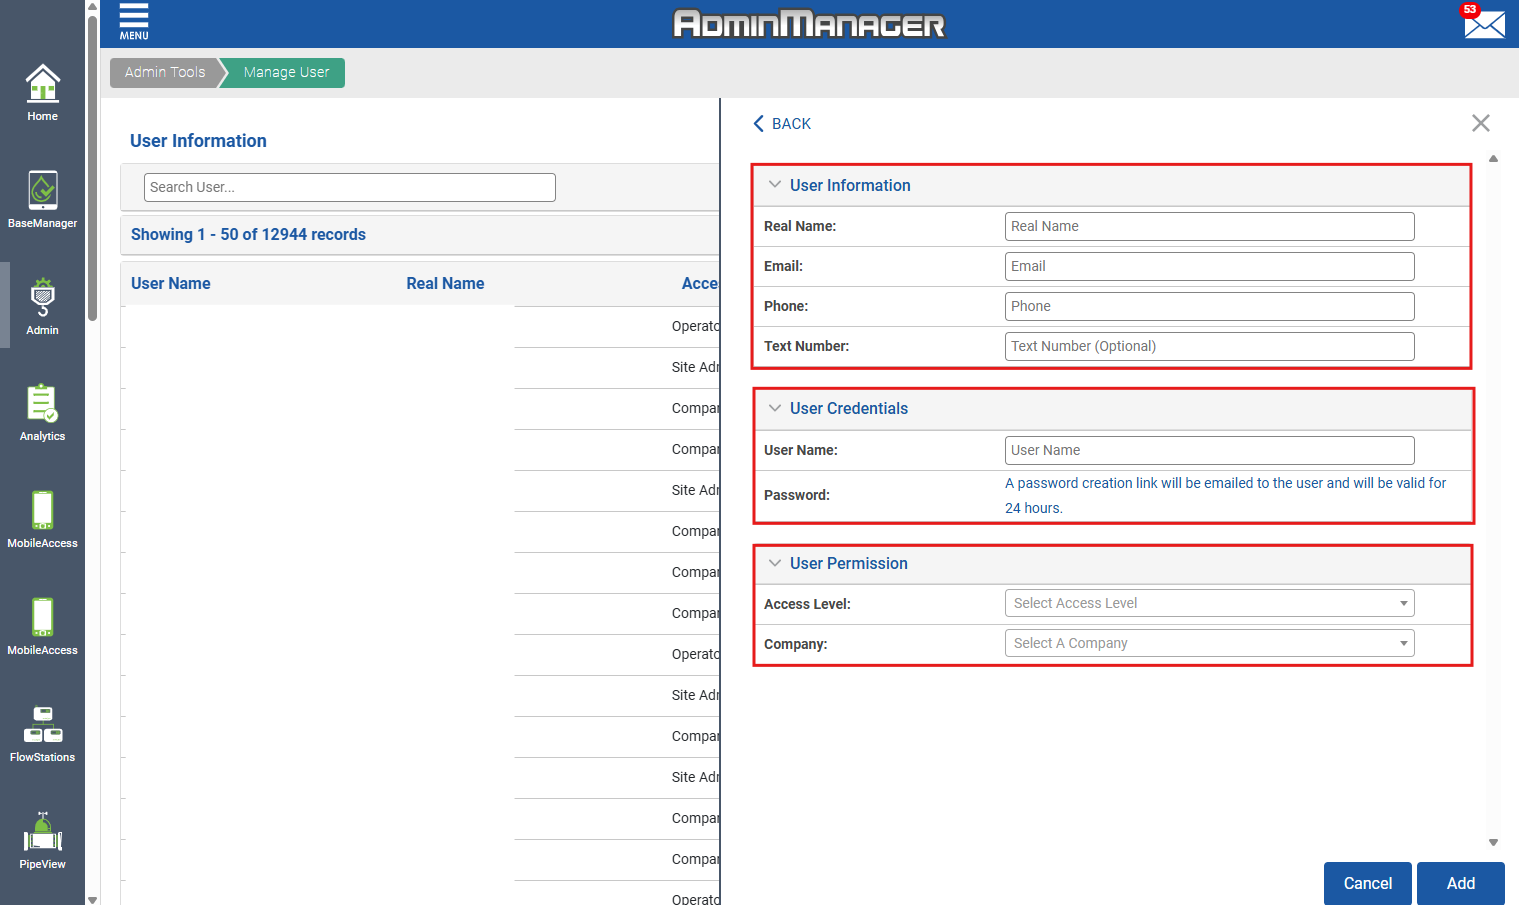
- If the requester is wanting to be text messaged for alert notifications, you can enter in their number in the Text Number field.
- The access level will vary for each case but must be approved by one of the Company Admins - there will be 3 options to chose from: Company Admin, Site Admin & Operator.
- After all the required information has been filled out, select Add at the bottom right corner.
- A Welcome email will be automatically sent to the user, so they can create their password
- The Welcome email will expire in 24 hours
🚨Creating a new user does not automatically grant access to the companies controllers. Controller access must be assigned separately.
How to provide User Access to a Controller
BaseManager users with Company Admin privileges can access the AppManager Admin t
[insert-question 2936434]
Legacy Process
1. After you have logged into BaseManager, click the Menu icon

in the upper-left corner of the page.
2. In the menu, click Administration.
3. In the next menu, click Administration again. The BaseManager Administration interface opens in a new browser tab.
4. In the My Company Admin menu on the left side of the page, position the cursor on My Users. In the expanded menu, click Create a Single User.
Note
You can also go into the Edit My Users option, and then click the Add link at the bottom of the table.
5. In the Real Name field, type the user's full name.
Note
The fields marked with an * are required.
6. In the Username field, type a username for the person. Note: Do not use spaces in the usernames, else the user will not be able to receive password reset emails. Spaces are noncompliant with AWS.
Tip
A typical username format is the initial of a person's first name and their last name spelled out, such as jjones for John Jones. However, we recommend that you assign a username that will not be easily duplicated. You may have more than one BaseManager user who could be assigned the username jjones, and for that reason, you might want to spell out both the first and last names as the username. For example, johnjones
7. In the Password field, provide a secure password. This will be required by the user to log in. A password must have a minimum of 8 characters that include: a Capital letter, Number, and Symbol.
8. In the "User Access" field, click the arrow at the end of the field, and in the drop-down list, click one of the options to set the level of access granted to the user.
IMPORTANT
You can give Company Admin access privileges to more than one user. Baseline recommends that you have at least one other administrator to avoid being restricted from the administrator functions when the original administrator is not available.
9. In the Email Address field, type a valid email address for the user.
10. In the Phone field, type the user's phone number if you want to record it here.
11. In the TXT Number field, type the number where the user can receive text messages. If you do not want the user to receive text messages from BaseManager, you can leave the field blank.
12. In the Disable All Alerts field, click one of the options to indicate whether the user should receive alerts from BaseManager.
13. Click the arrow to display the drop-down list in the Time Zone field. In the list that displays, click the time zone where the user works.
14. In the remaining fields, click the radio buttons to indicate when you want the user to receive messages from BaseManager.
15. Click Add. The All Users list displays and shows the new user.
16. Go to the Edit User page for the user that you just added and update the following fields: Activation Status, Default Alert Method, and Cell Provider's ID.
17. If the irrigation controllers that the user needs to have access to have already been added to BaseManager, perform the substeps below. Otherwise, skip those steps, and then follow the instructions in Adding Controllers to BaseManager. Then return to this procedure and assign the controllers to the user.
- Scroll down to the bottom of the page so you can see the Configure User's Controllers pane. The controllers that have been added to the BaseManager account display in the pane. Click Allow All in the top corner of the pane or select the check box for the controller that you want the user to have access to.
- Click Save Users Controller Assignments.
18. When you have finished the BaseManager admin tasks, log out of the Admin interface by clicking the Logout link in the upper-right corner of the Admin page.