Creating a Site Group, or making an existing Site Group viewable to a User.
Site Groups created for the WCMS account are not visible to individual customers (Users) automatically. Nor are Site Groups created for one customer on an account viewable by another customer on the same account. A new Site Group (or Site Groups - depending on how many were made for the account) will need to be created for each person requiring visibility. The new Site Group(s) mirrors the one created for the WCMS account or any other account that has a Site Group to share. The following steps will show you how.
1. Log in to WeatherTRAK.net
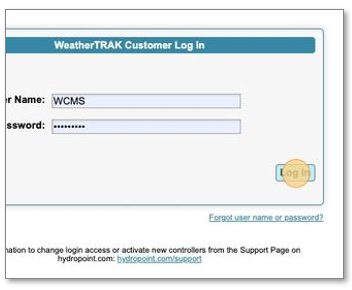
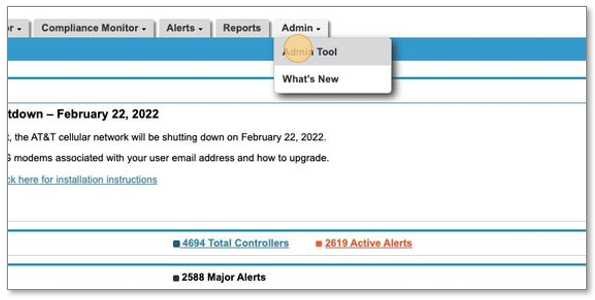
2. Navigate to the "Admin Tool" under the Admin tab.
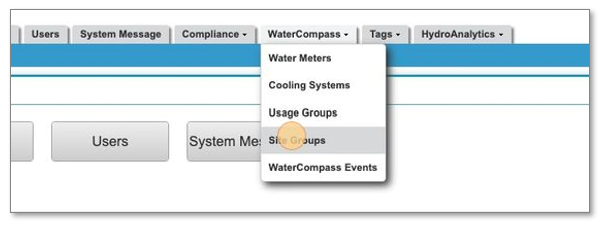
3. From the "Admin Tool", click "Site Groups" under the WaterCompass tab. This is also found as a button on the page, under WaterCompass.
4. Search for the "Account Name" the customer (User) and their Sites are a part of. In this example, we'll search for "Giant Eagle".
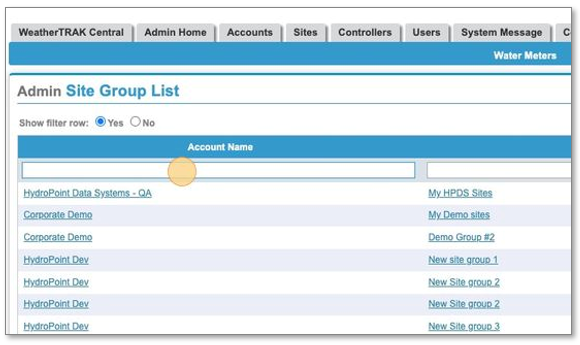
Once the Account Name filter reveals the results. Make note of already existing Site Group Names used by WCMS WaterCompass. You will be referencing them momentarily.
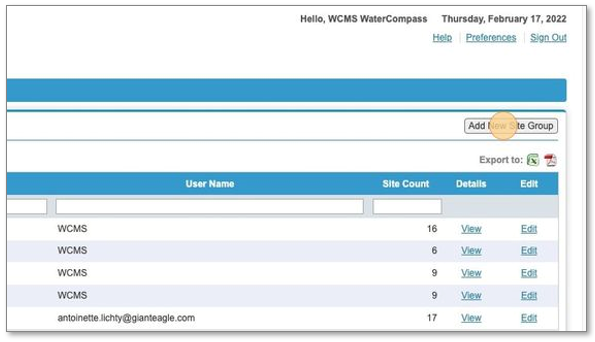
5. Click the "Add New Site Group" button, at the top right of the table.

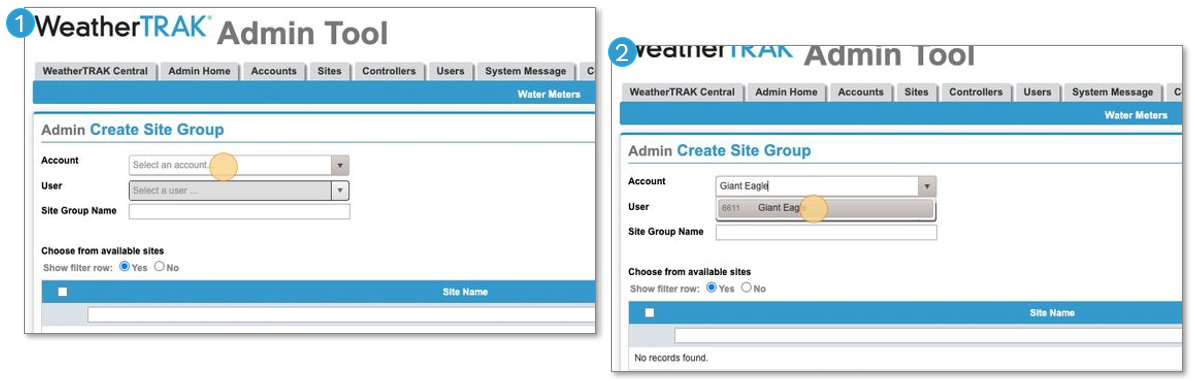
6. Locate the "Account Name" via the dropdown/search field. You can type the name to filter the list. In this example, we'll type the same "Account Name" as on the previous page and select it from the list.
- In this example, we'll choose "Giant Eagle".
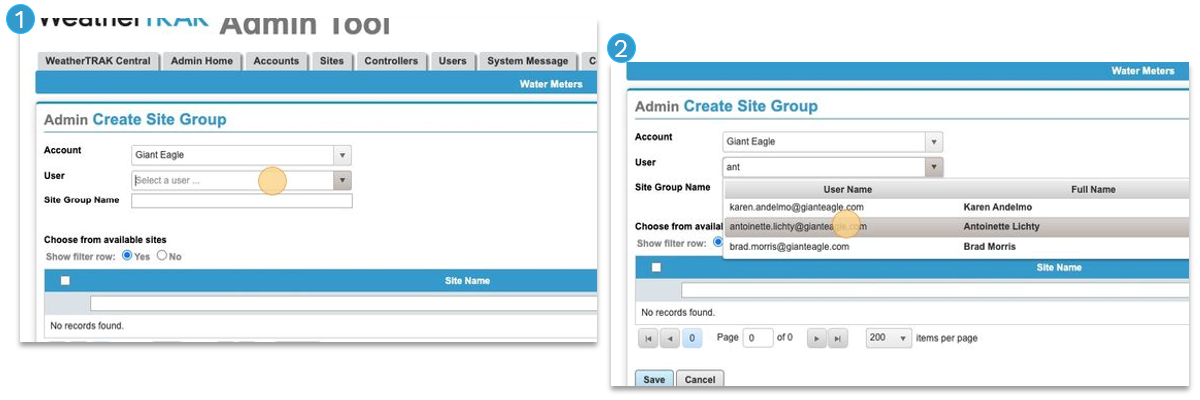
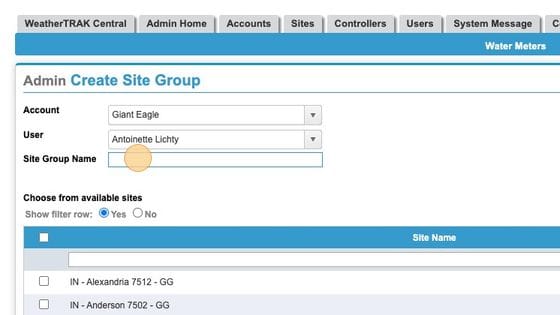
8. Select the customer's "User Name" from the list. You can type the name to filter the list.
- In this example, we'll choose "Antoinette Lichty" from the list.
10. Now we will reference the "Site Group List" from a few steps back. We want to make sure we use the same "Site Group Name" for the customer's new "Site Group" we are creating, for consistency.
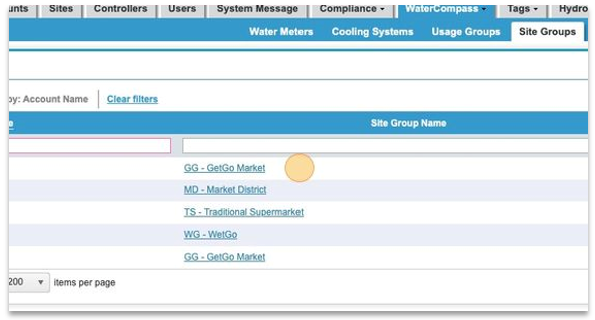
11. In the "Site Group Name" field, we will name the new "Site Group" the same name we reference in the previous step. We'll call it "MD - Market District", in this example.
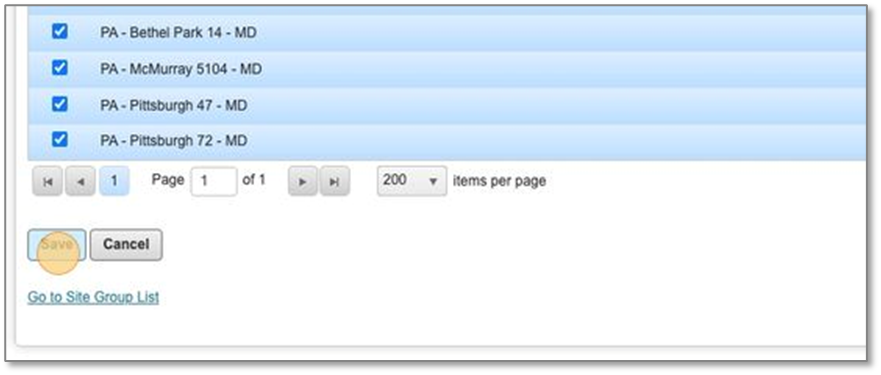
12. Click "Save" once finished, and your new site group has been created - specifically for the customer (User) selected.
13. Returning to the "Site Group List" (after filtering the column to the "Account Name" we were working on), the new "Site Group" is listed for the customer. "

Verify the new Site Group(s) is available by logging into the WaterCompass dashboard as the customer and checking the Site Group dropdown. Repeat these steps for each Site Group and each customer requiring visibility.
14. Select the "Site Names" you want to add to the group from the list by checking the box left of the name.
Our Professional Services team did a great job naming the Sites for this account, so in this example, we can search for "MD" to find all of the Sites to add to the new "Site Group".
We can also select all of the Sites at once by clicking the checkbox at the top of the column.