
New Installation
Step 1: Login HPDS Admin
- Login to HDPS Admin
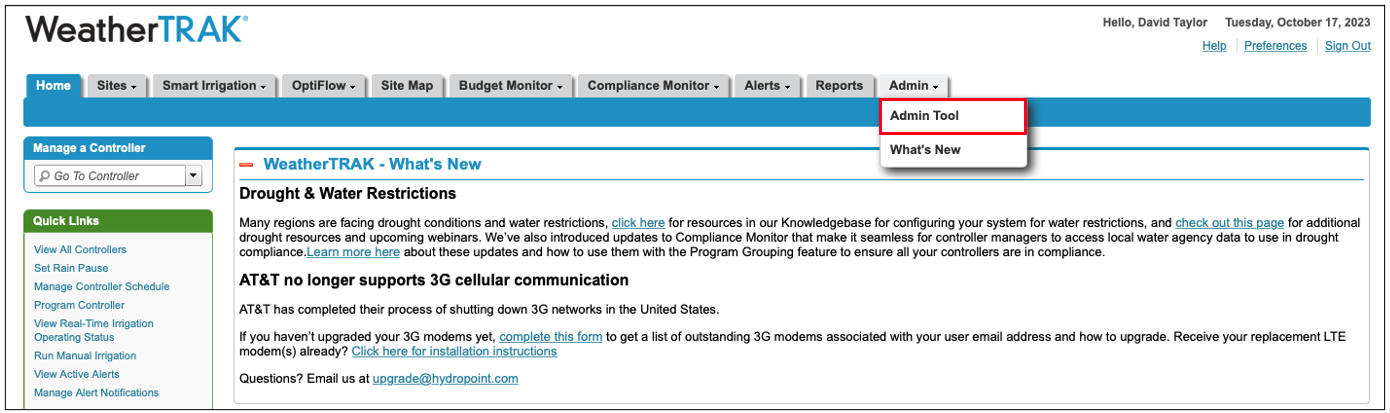
- Select the Admin tab from the menu
- Select Admin Tool.
Step 2: Verify or add the account
- From the Admin Home page, go to the Account tab
- Click Add New Account in the upper right corner
- Enter the Account Name (e.g. Clarion/Redaptive)
- Add the address from Service Max (Work Order → Account → shipping address)
- Save the new Account
Step 3: Verify or add the site
- From the Admin Home page, go to Sites
- Click Add New Site in the upper right corner
- Enter the Site Name (e.g. CA - 1002 South Carnegie Avenue)
- Add a Description (can match the Site Name)
- Select the Account from the dropdown
- Add the address from Service Max, or click Copy Account Address
- Click Geocode from Address to set the location
- Save the new Site
Step 4: Verify or add a new Water Meter
- In Device Details, add the Account and Site
- Select Add New Water Meter
- Enter Water Meter Name with meter type and serial (e.g. Irrigation (SN:12345678))
- Set Meter Type (typically Commercial or Irrigation)
- Set Water Source (typically Potable)
- FM350: Unit of Measure = always Gallons
- Save the water meter, then add Monitoring Point Details:
- Monitor Type, Usage Group (Irrigation = Outdoor + Total)
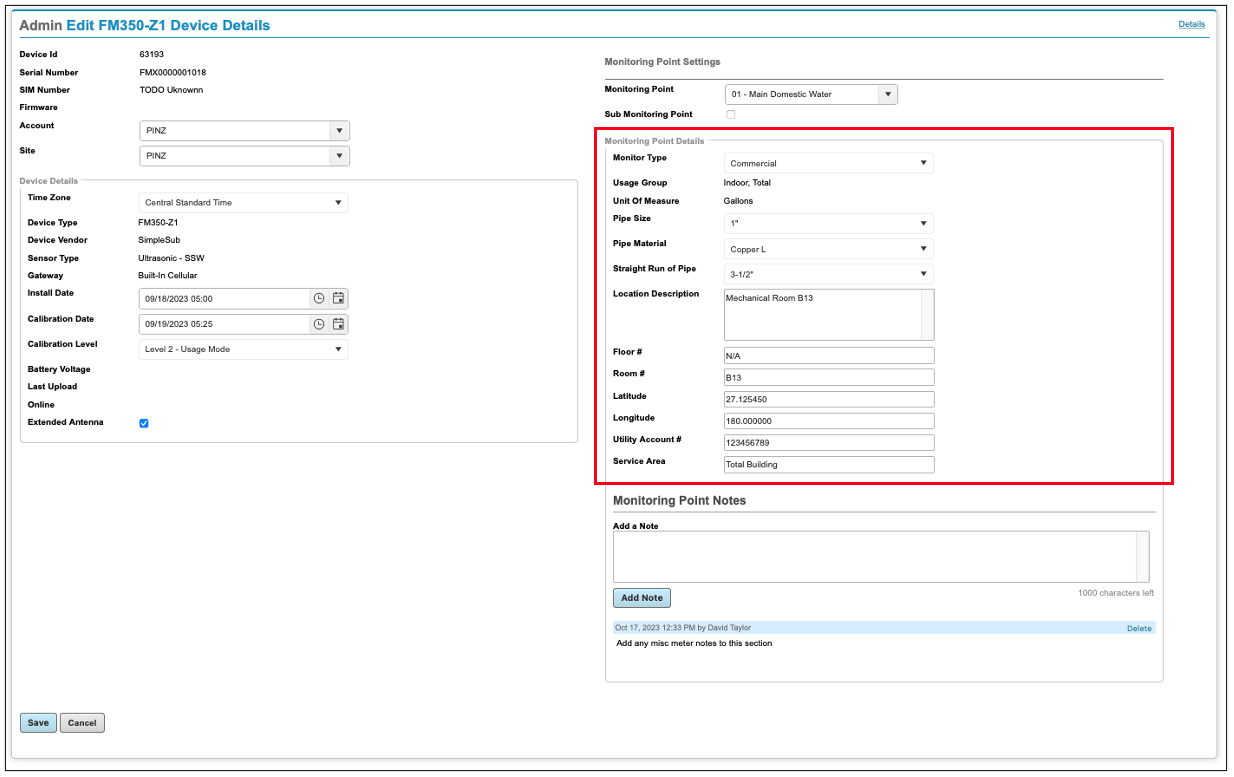
- FM350 only: Pipe Size, Pipe Material, Straight Run of Pipe
- Location Description, Time Zone, Install Date
- Save all data
Step 5: Search for the device
- Select Water Meters from the Admin Tool menu
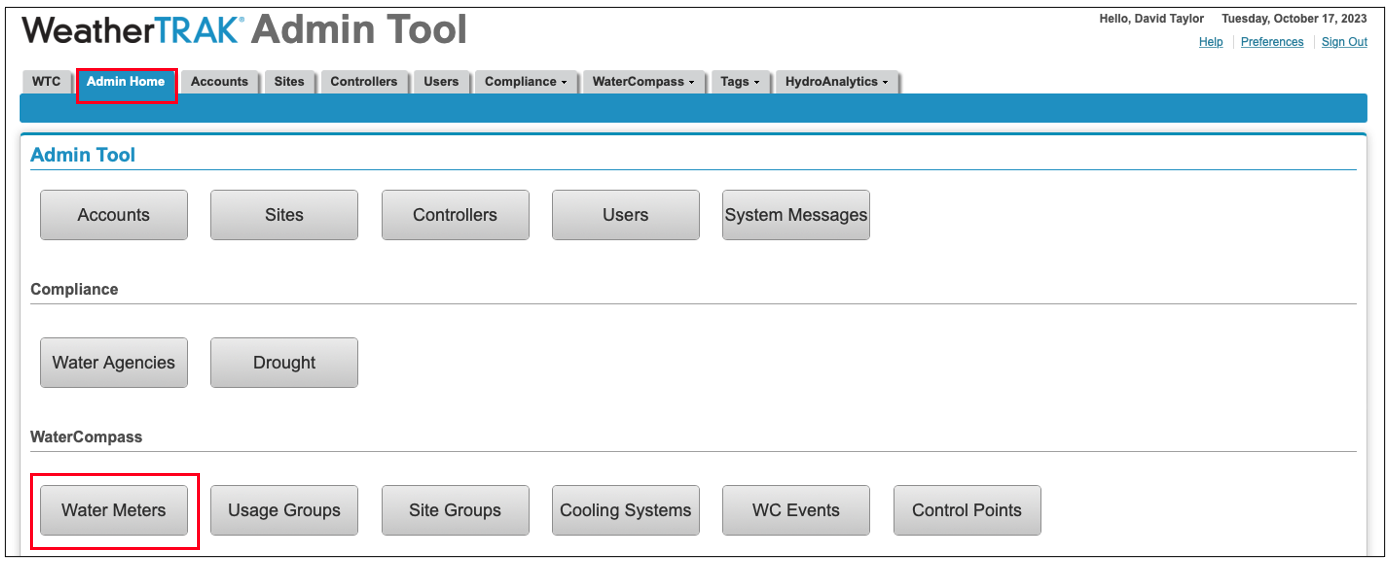
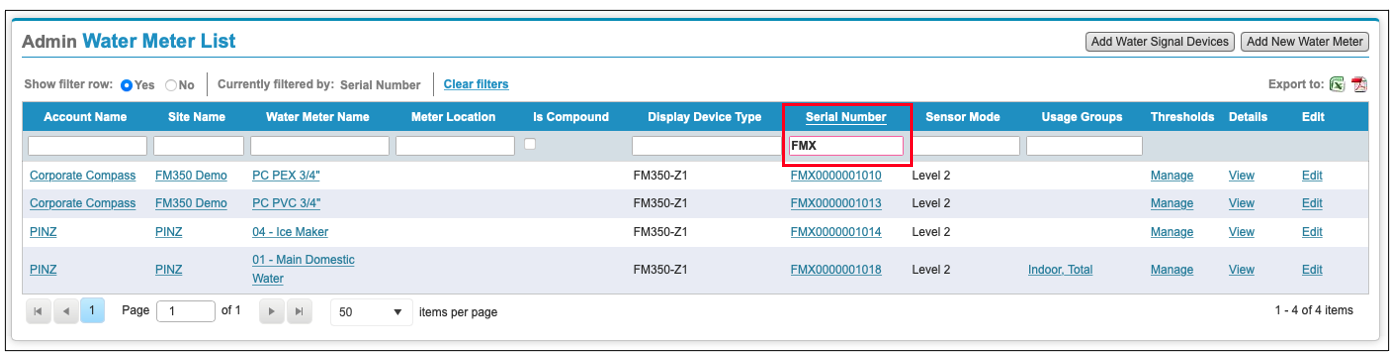
- Search for the FM350 using the device serial number
Note: 10-digit serial number starting with the prefix FMX
Step 6: FM350 Configuration
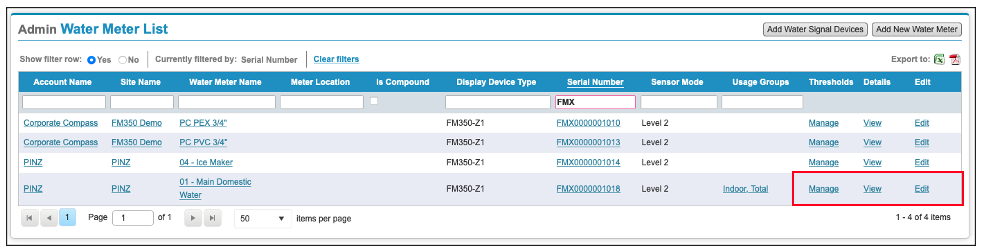
1. Select Edit to configure the FM350 device
- Manage - view and edit threshold settings
- View - view read only device details
- Edit - edit device details
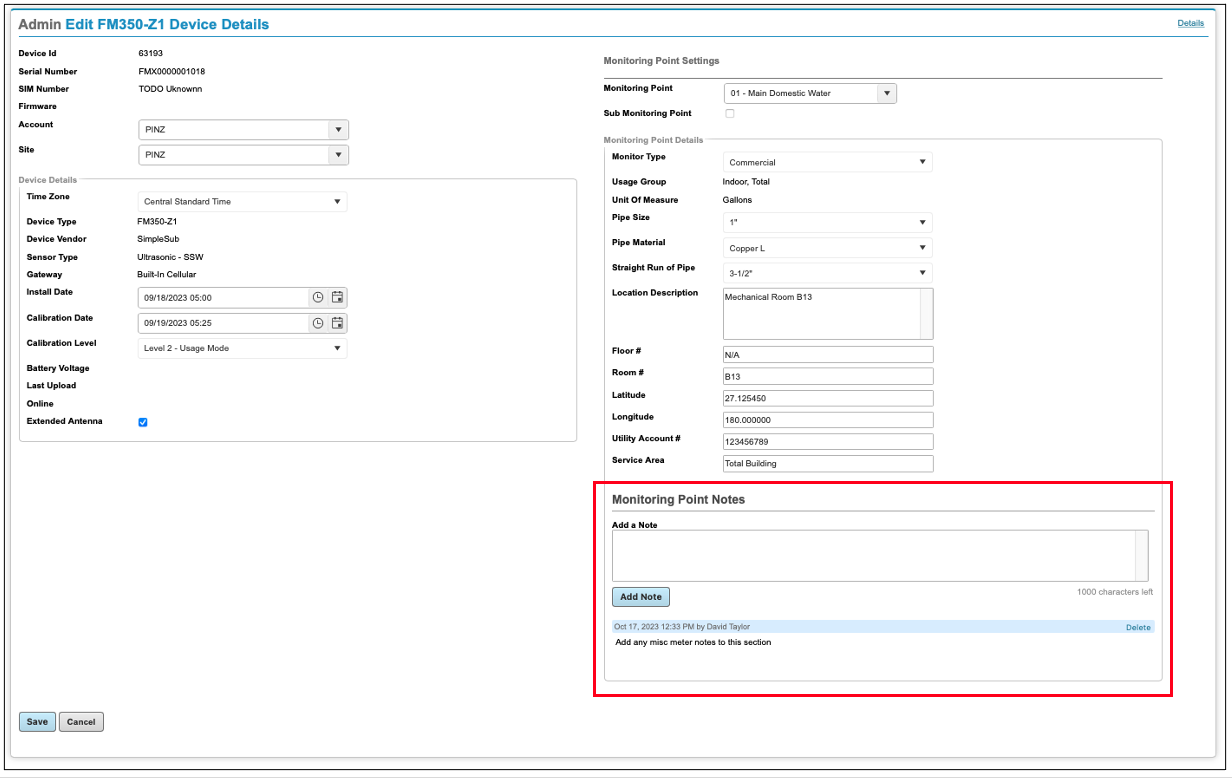
2. Assign an account and site to the FM350
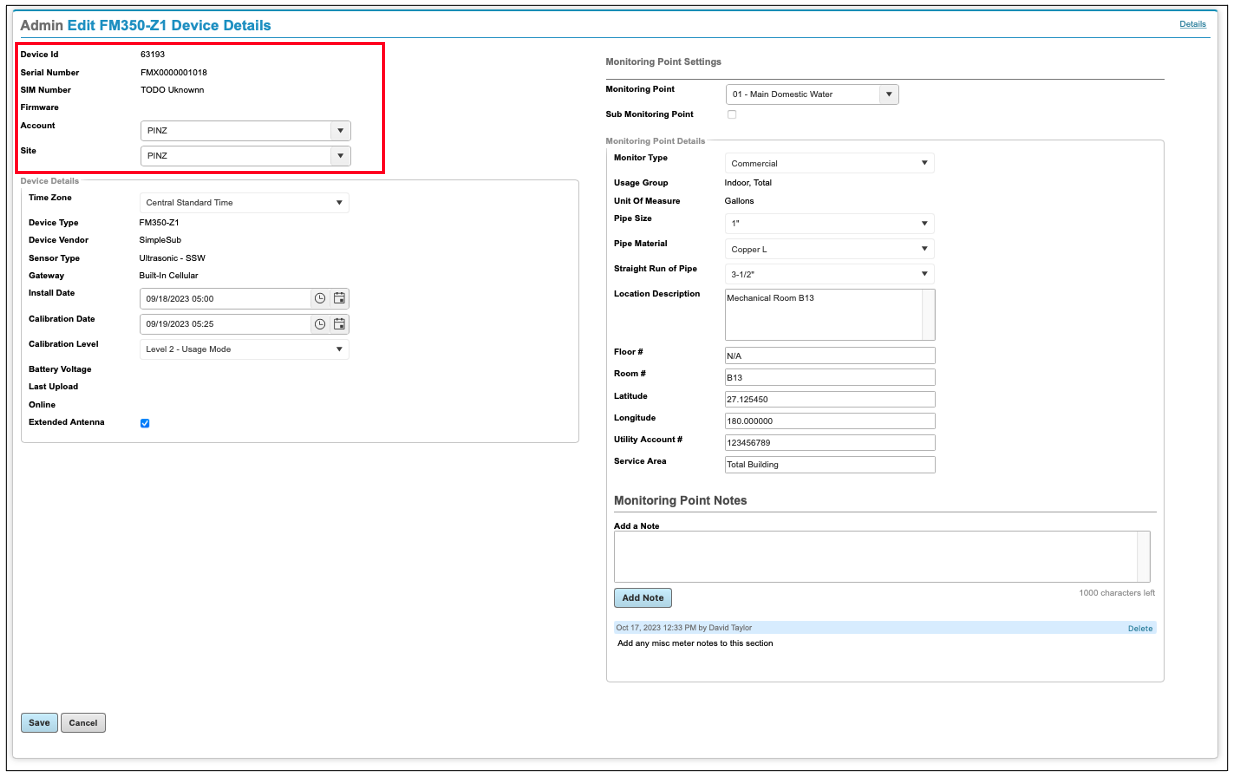
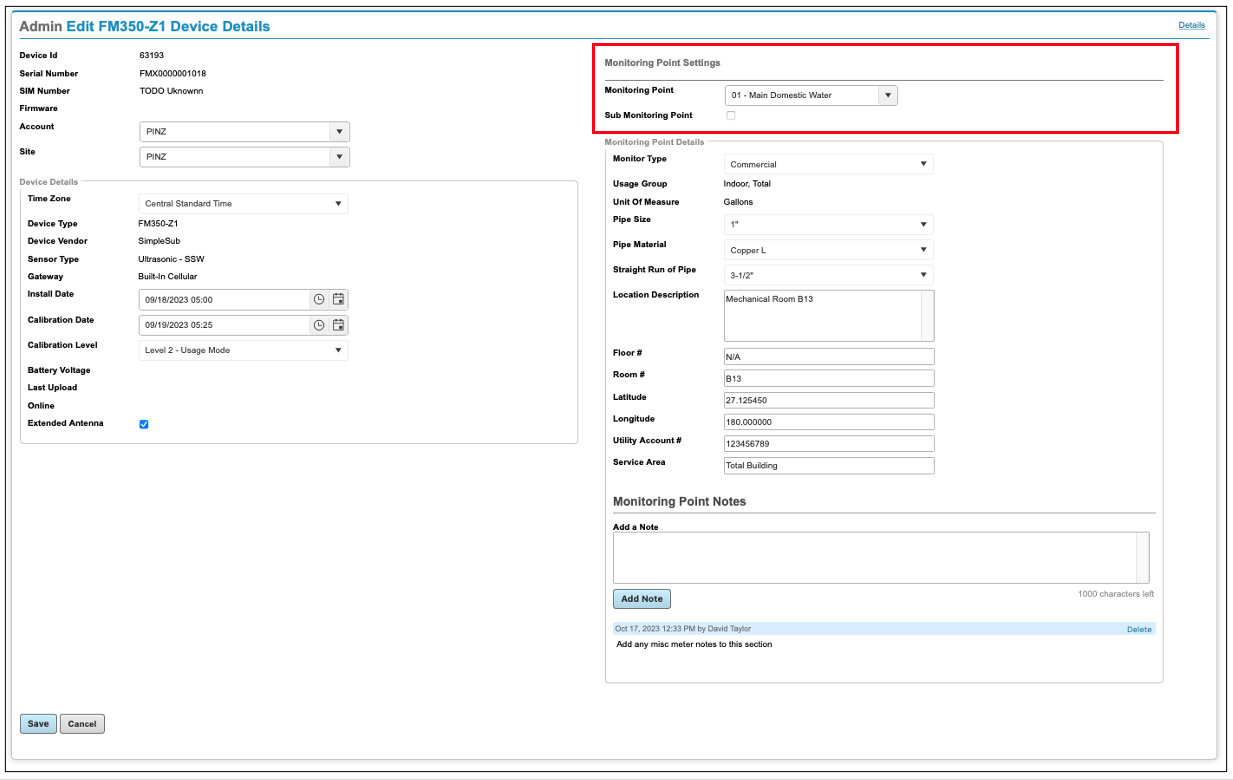
3. Assign a Monitoring Point (Water Meter)
Note: The Monitoring Point can be flagged as a Sub Monitoring point downstream of the main meter or main monitoring point in the building.
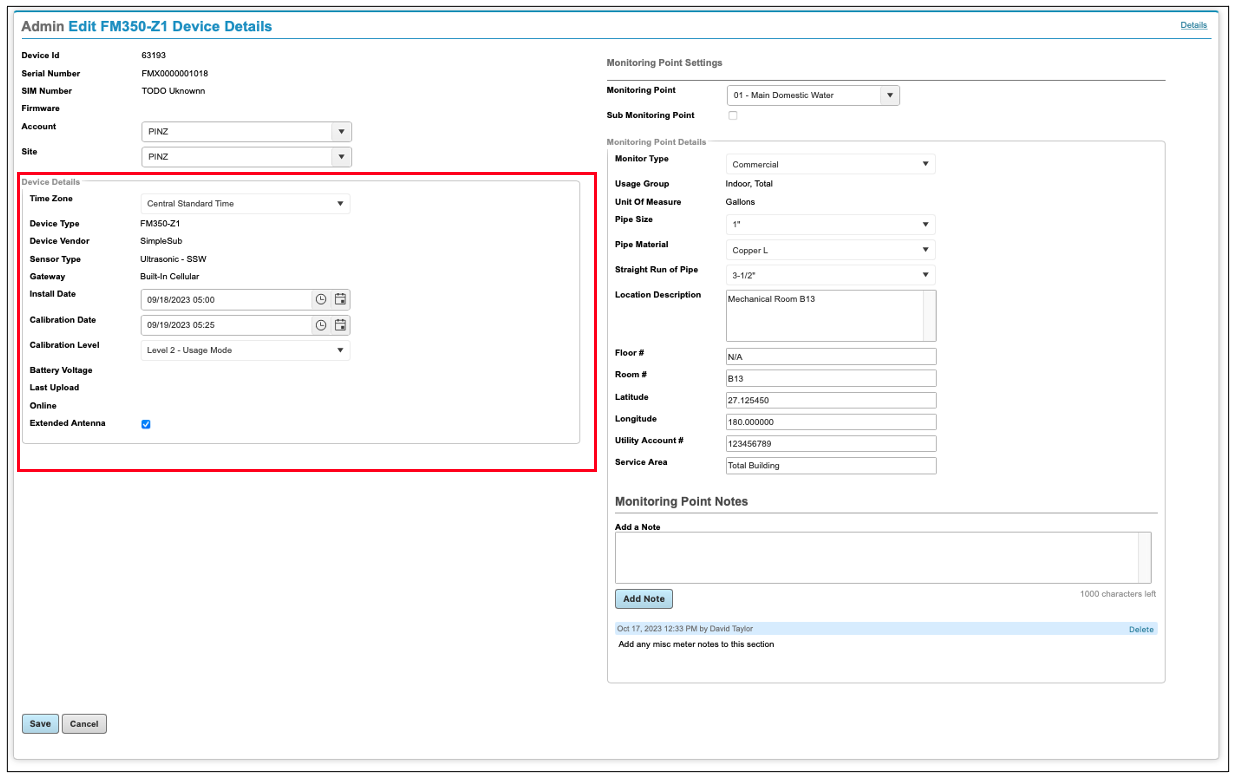
4. Update the device details
- Verify the timezone setting is correct
- Set the installation date
- Set the calibration date
- If the antenna has been extended using a cable, flag the option for ‘Extended Antenna’.
5. Update Monitoring Point Settings
6. Add Monitoring Point Notes (If Applicable)
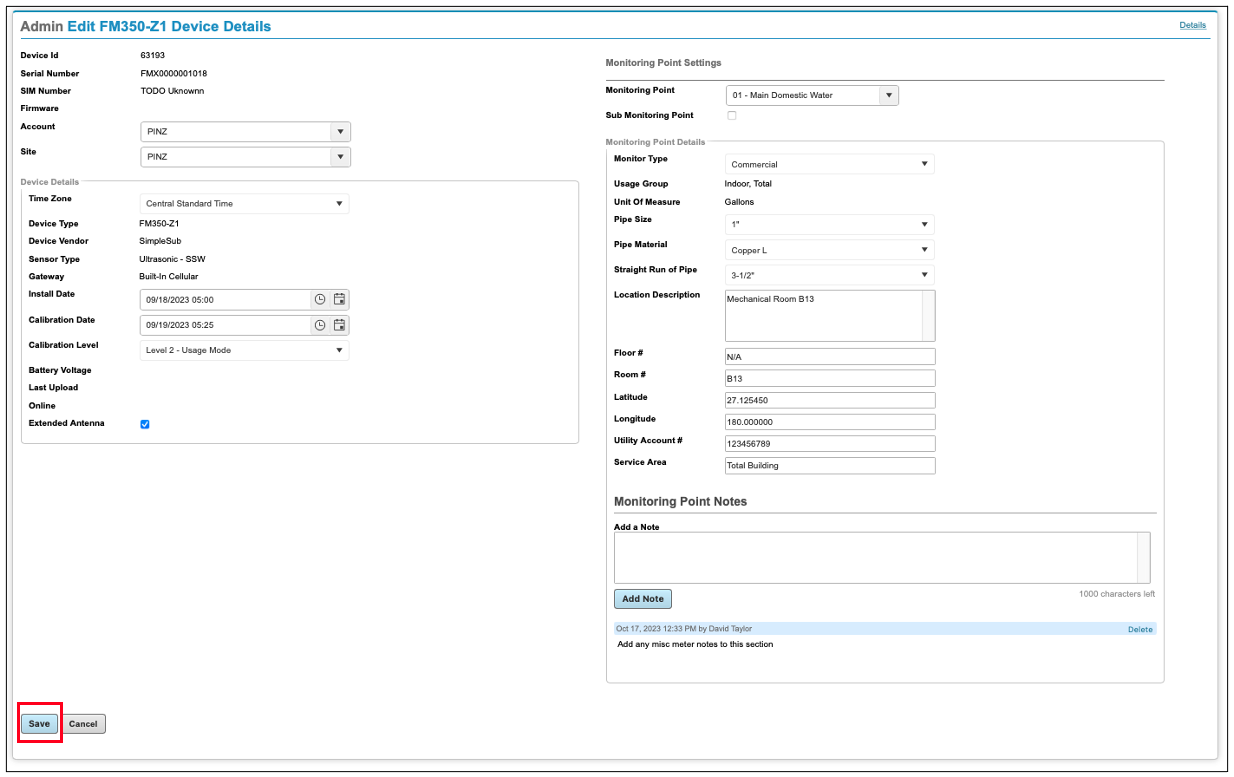
7. Save all data before exiting device details
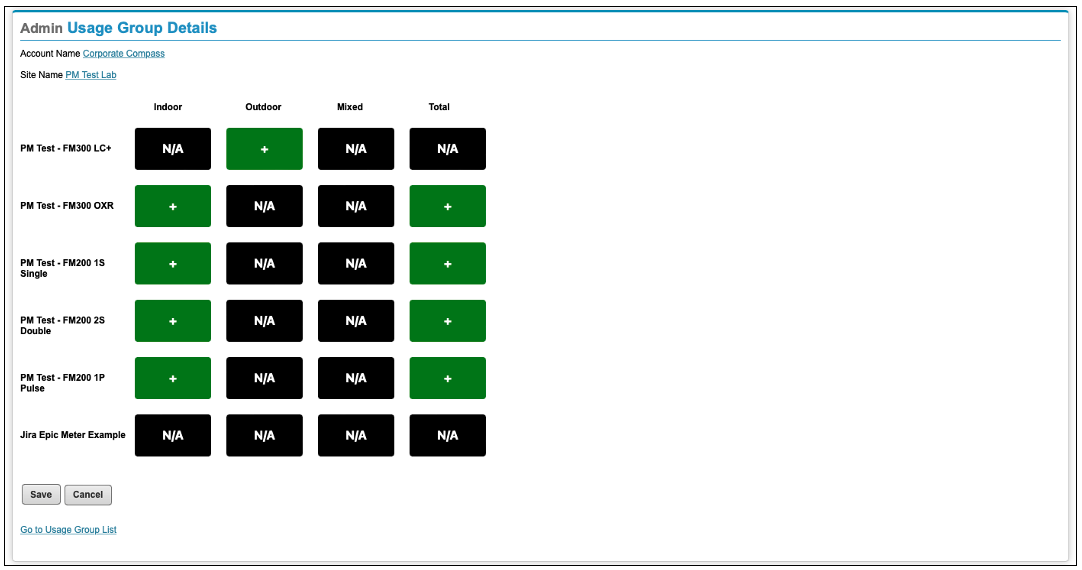
Step 7: Apply Usage Group
Set the usage group for the newly installed FM350 flow monitor.
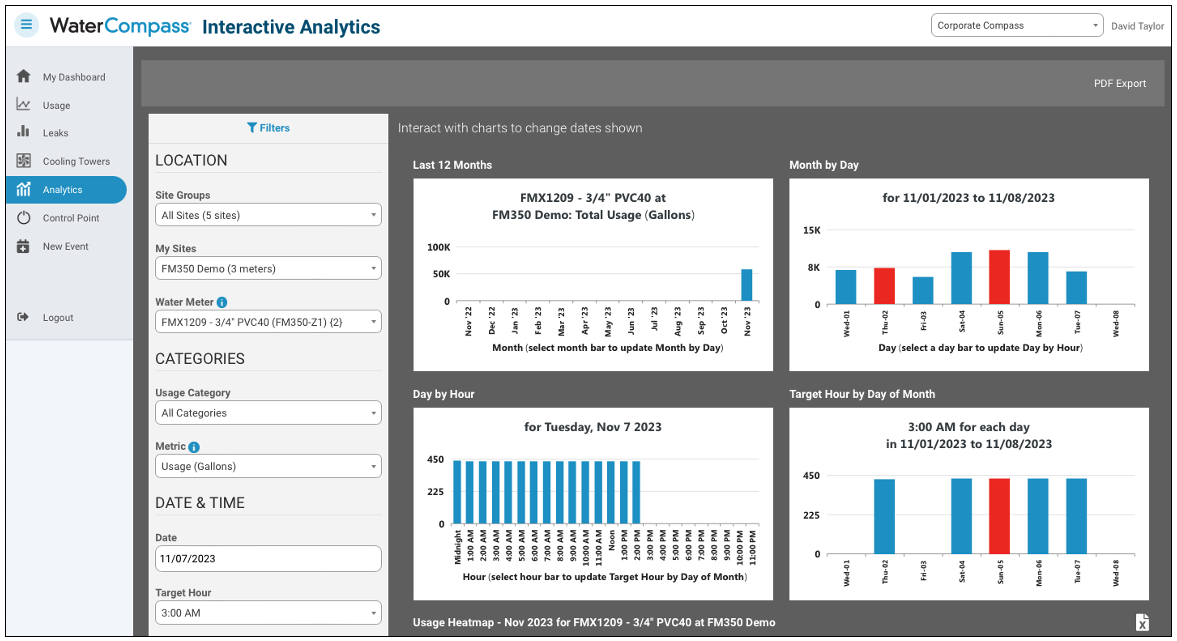
Step 8: Verify data on WaterCompass.net
Check and verify data is populating the WaterCompass dashboard the day after the device setup.
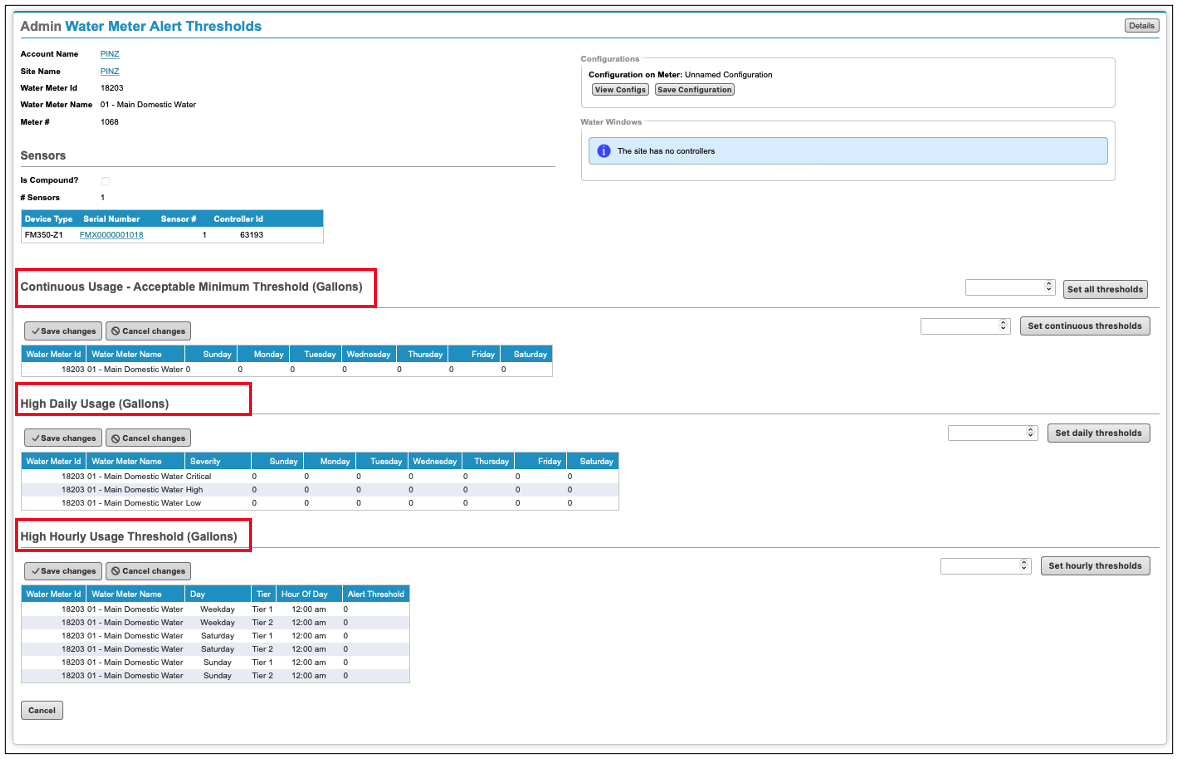
Step 9: Apply Thresholds
Applying thresholds to the data collected by the FM350 is consistent with how all existing WaterCompass flow monitors are calibrated. The process has not changed.
- Continuous Usage - Acceptable Minimum Threshold
- High Daily Usage
- High Hourly Usage
Device Replacement
Coming Soon…

© Copyright 2026 HydroPoint Data Systems, Inc. All rights reserved. HydroPoint, the HydroPoint logo, and WaterCompass are either registered trademarks or trademarks of HydroPoint, Inc. Other trademarks may be held by their respective owners.