
Watch the video below for an overview of creating a field service request.
Creating a Field Service Request Instructions
1. From an opportunity, Customer Support Service (Case), or a Customer Success Service (Case) click Field Service Request.

Salesforce will automatically relocate you to the ProService Request Edit screen.
Notice that the record you started from and the associated account has been pre-populated for you.
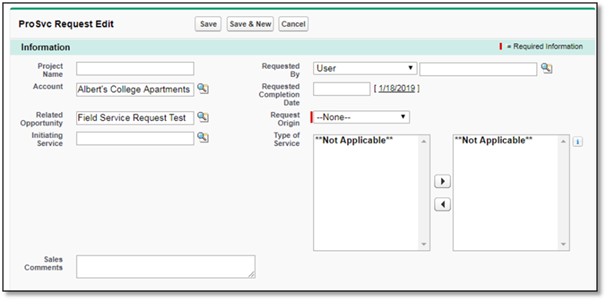
2. From the ProServices Request Edit screen, complete the following required fields:
- Project Name
- Requested By
- Request Origin
- Type of Service (this is multi-select, so select all options that apply)
Other fields that may be helpful to Professional Services: - Requested Completion Date
- Sales Comments
3. Click Save.
4. From the Project Request Edit screen, scroll down to the Sites section and click New Site to add the site where the services will be performed.
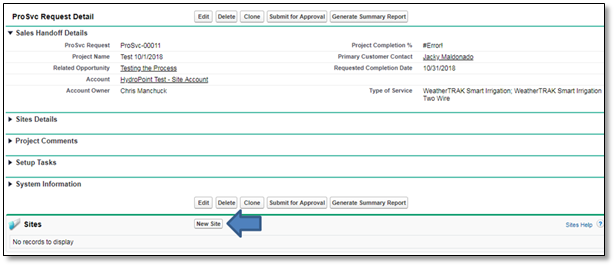
5. From the record type selection screen select Field Service Visit Type.
6. Click Continue. Salesforce will reroute you to the Site Edit screen.
7. Fill out all required fields including:
- Site Account: this should be where the service is to be performed
- Site Contact: who will be on-site if needed
- Request Origin
- Type of Service
8. Click Save.
9. Navigate back to the Project Request level and repeat these steps until all sites have been successfully added.
10. After all sites have been added and all data has been filled out to the best of your knowledge, click Submit for Approval. from the Project Request page. Be sure to click Submit for Approval from the Project Request page and NOT the Site page.
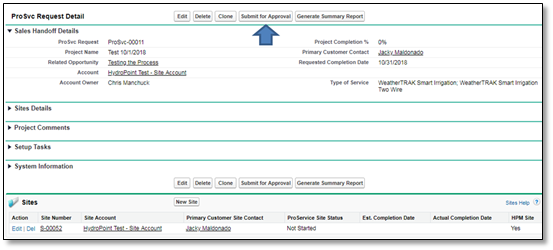
This Approval Request serves as the official handoff from the requestor to Professional Services. This step will give the Professional Services Team a chance to review all the data presented, ask questions, and officially take ownership of the project.
Creating a Work Order
1. From the Field Service Site Record, make sure that the Installer field is populated. Salesforce will automatically populate the Installer Account and Installer Level once the Installer has been selected.
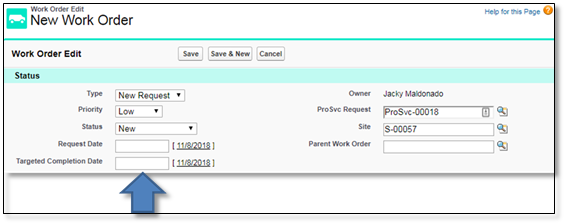
2. Scroll down and click New Work Order.
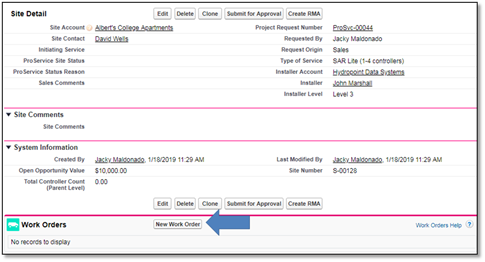
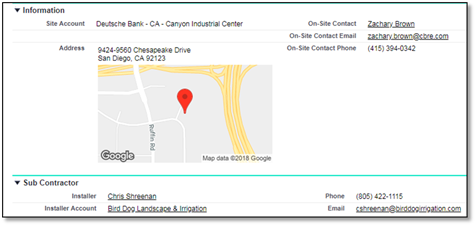
Salesforce will re-route you to the Work Order page and auto-populate the ProService Request number, the Site number, and the On-Site Contact. This is all based on data populated in the Site record.
3. Verify that Type, Priority, and Status are correct.
4. Complete the Request Date and Targeted Completion Date.
5. Re-add the Installer, Installer Account, and Price Book. (Salesforce Process Builder will not run in the Sandbox).
6. Click Save. The Site Account Name and Address will auto-populate.
Adding Line Items to a Work Order
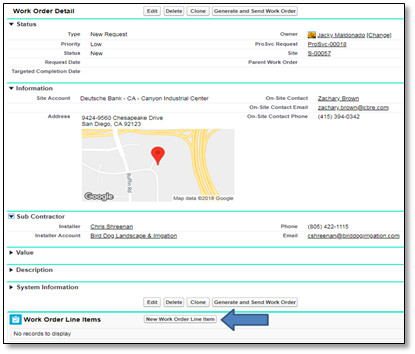
1. Scroll to the Work Order Line Items section and click New Work Order Line Item.
2. From the New Work Order Line Item page, select the Product (or Installation SKU) that HPDS is requesting the installer to perform. You can use the available options in the Standard Sub Contractor Price List.
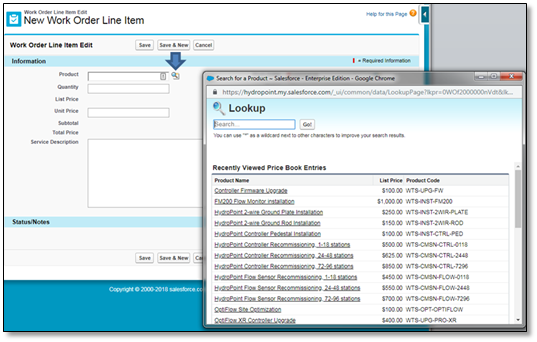
3. Add the quantity and click Save.
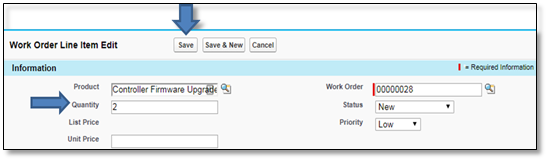
Salesforce will populate the List Price, Unit Price, Subtotal, and Service Description.
Note
Both Unit Price and Service Description are editable if needed.
4. Repeat these steps until all line items have been added.
Generating and Sending Work Orders
1. After all the work order line items have been added and you are ready to send the work order to the installer for completion/signature, scroll to the top of the Work Order and click Generate and Send Work Order.
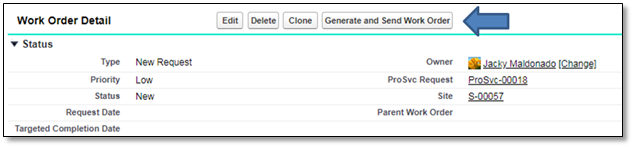
Salesforce will route you to the Conga Composer screen.
2. Select the Work Order Template, and click Merge & Conga Sign.
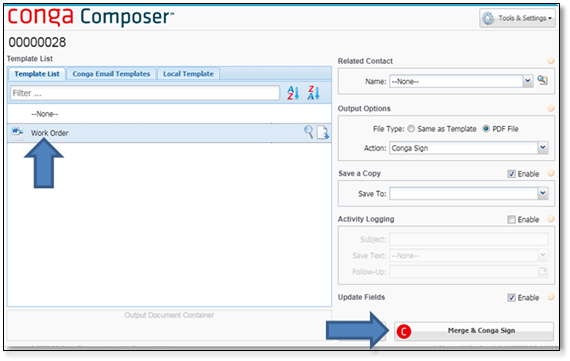
Salesforce will route you to the Create Transaction screen, which is a final review before sending the document to the Installer.
3. Verify the correct Signatories (the people signing the order) are selected:
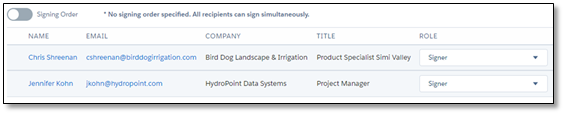
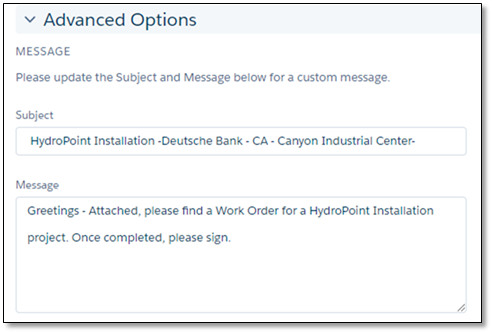
4. Update the outbound message as needed. This is the message that will appear in the email body requesting for signature:
5. After all the updates have been made, click Send Now.
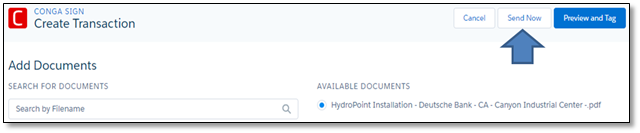
Salesforce will email a copy of the work order to the Installer for electronic signature. As the sender, you will also receive a copy. After the document has been signed, a notification will be sent to you as the sender and the next person to sign. Once all signatures have been captured, you will receive a final notice, along with a copy of the fully executed work order.
All signing parties will receive a copy of the completed document.

You can also check the status of the signatures from the Conga Sign Transaction Related list on the work order:
The completed document will also be automatically attached to the Work Order record.
