Introduction
This document covers installation for the WC-FM300-US Ultrasonic Flow Monitor for pipe sizes of 1/4 - 2”.
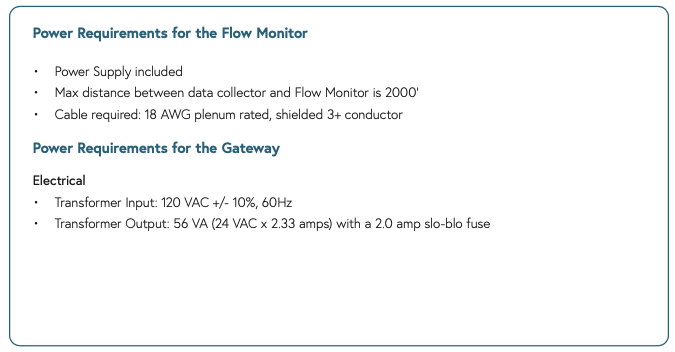
The WaterCompass FM300 Ultrasonic Flow Monitor is a clamp-on flow monitor with a 30 V power supply that connects to the WaterCompass Data Collector.
The monitor sends real-time flow data to the WaterCompass Data Collector that is viewed from the WaterCompass dashboard. Hourly summation of flow data is stored for analysis and reporting.
Contact Information:
WaterCompass 707-285-3250
Before you begin, review the safety precautions at the end of this installation guide.
Pre-Configured Settings
To ensure accuracy, the Flow Moniotor will be pre-configured with the following settings:
- Pipe size (varies)
- Pipe type (varies)
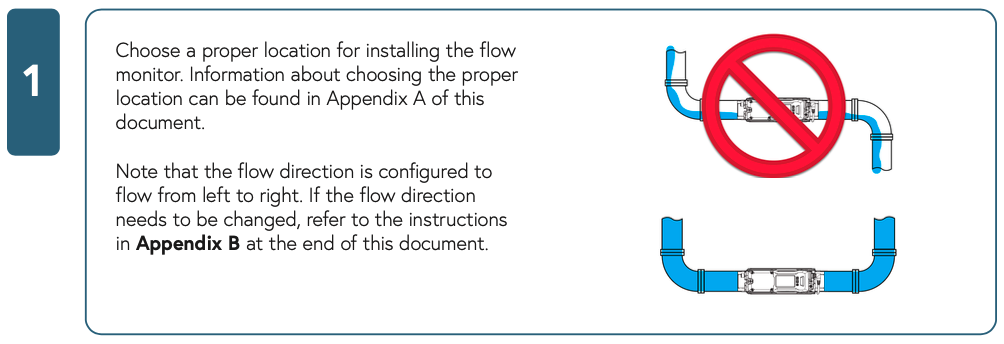
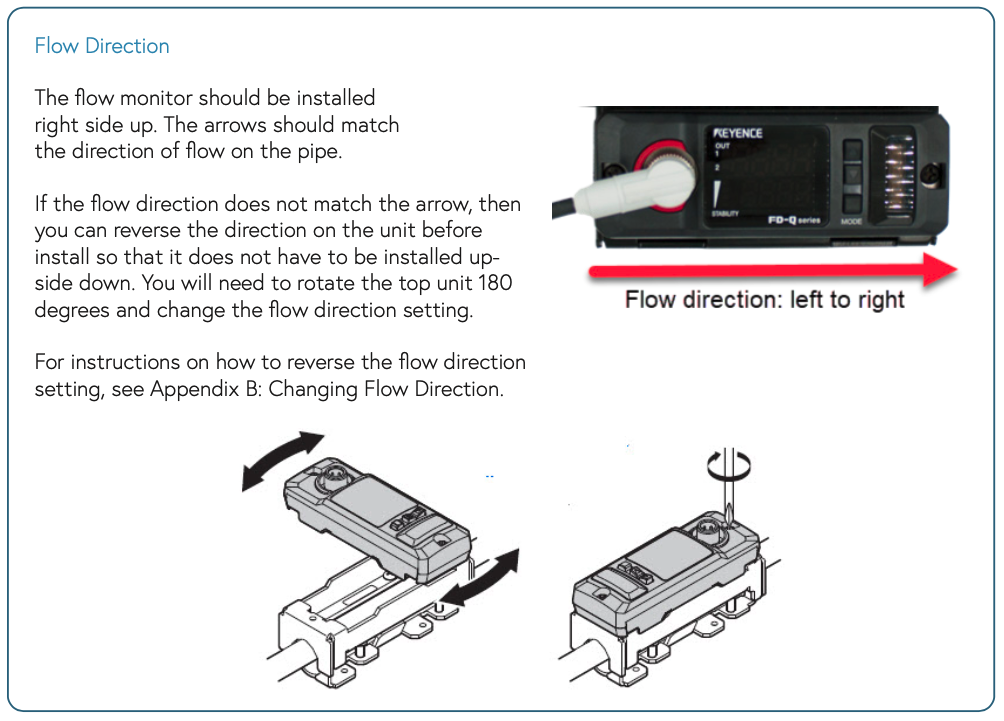
- Flow direction (right)
- K-value (60.1)
Materials Provided
- WaterCompass Data Collector (LC+)
- WaterCompass Flow Monitor
- 50' of multi-conductor (3+) shielded plenum rated 18 AWG cable
- 4 wire nutes
- 4 Data Collector mounting screws
- Barrel connector
Equipment Needed
- Philips head screwdriver with long shaft
- Torx screwdriver (for pipes larger than 2")
- Lock Nut
- Zip Ties
- J-box and fittings
Installation Overview
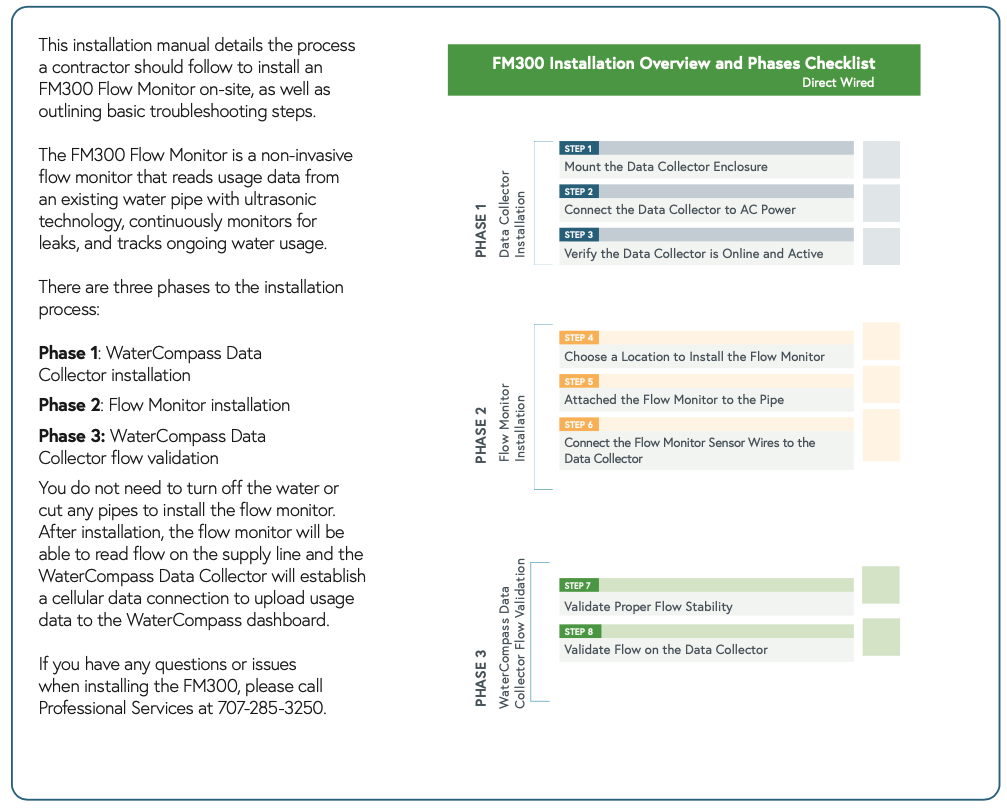
Phase 1: Data Collector Installation
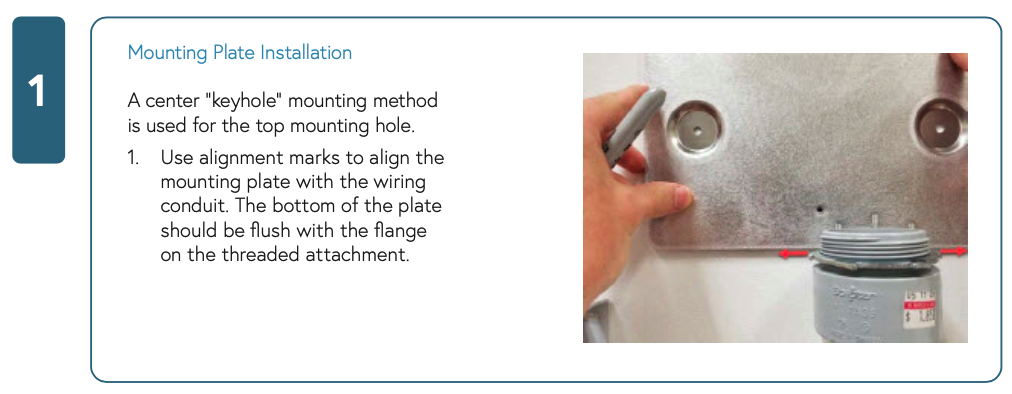
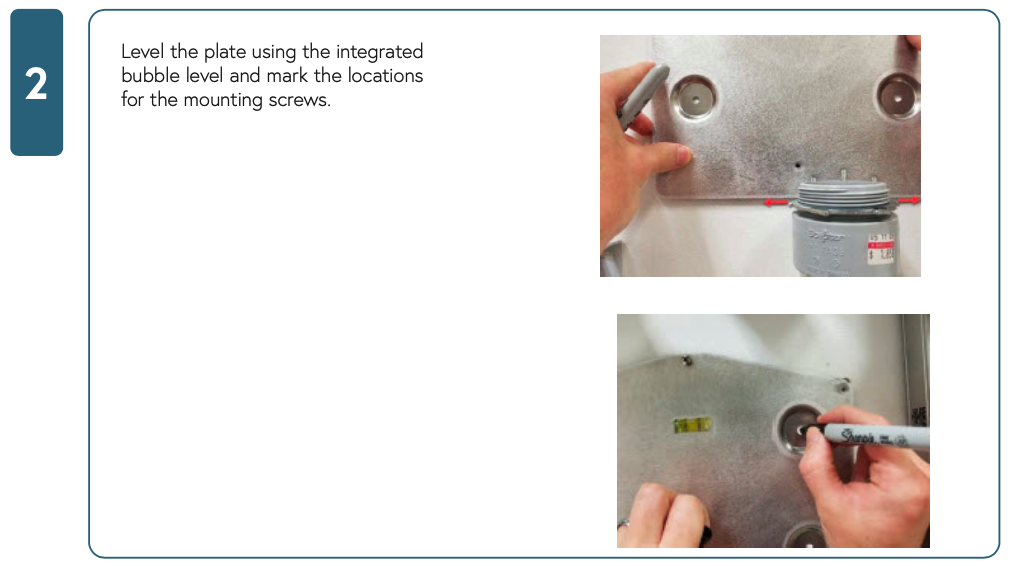
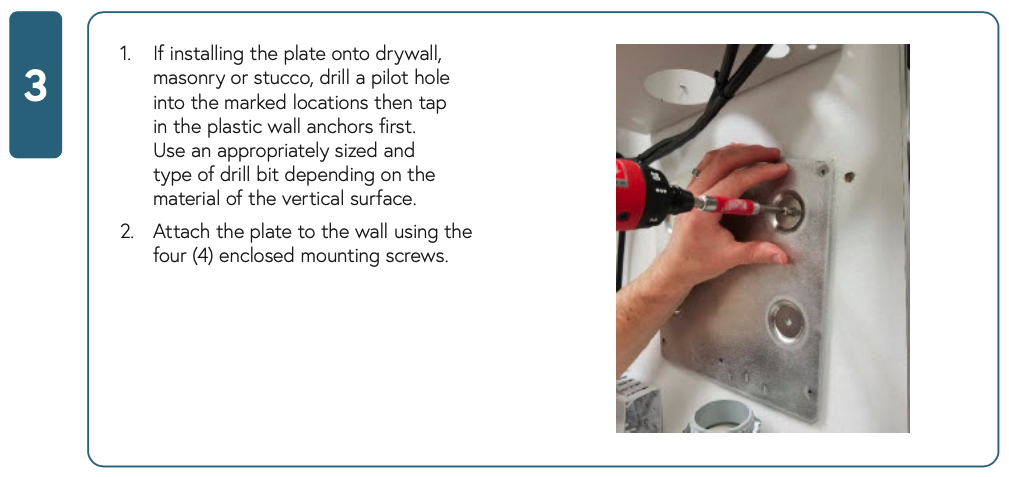
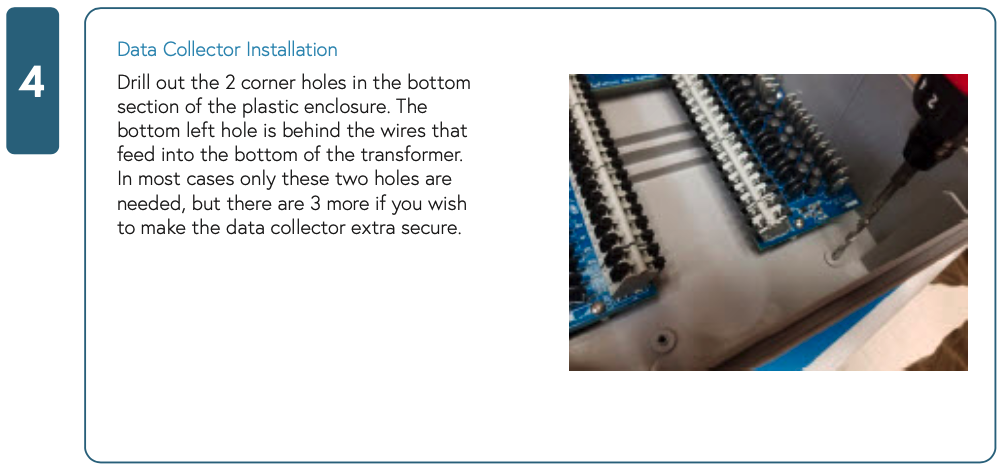
Step 1: Mount the WaterCompass Data Collector
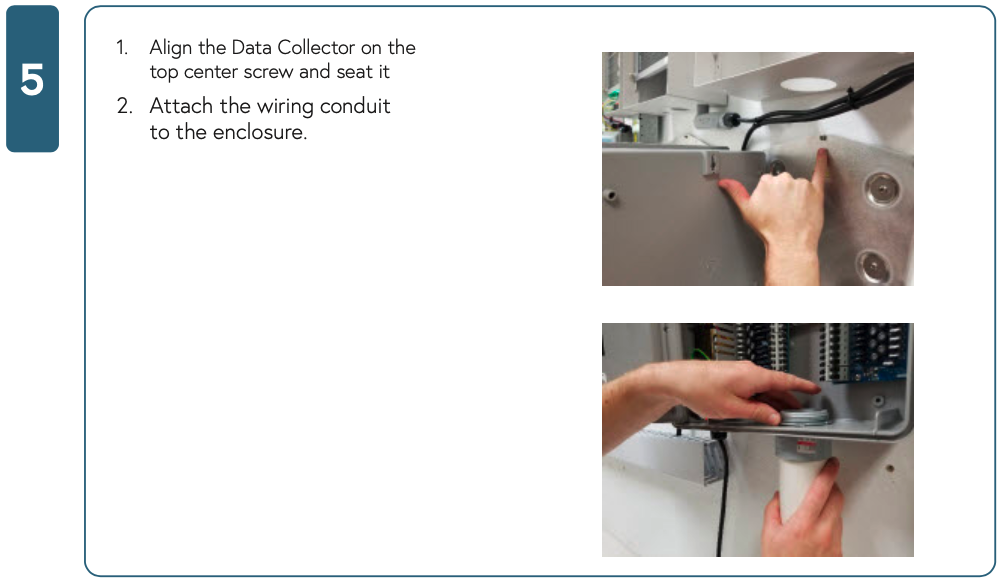
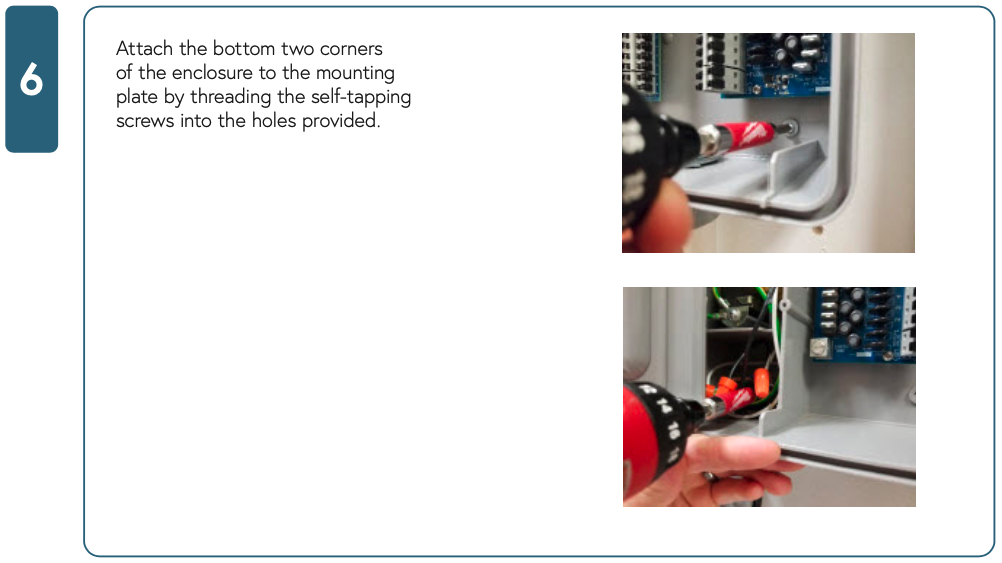
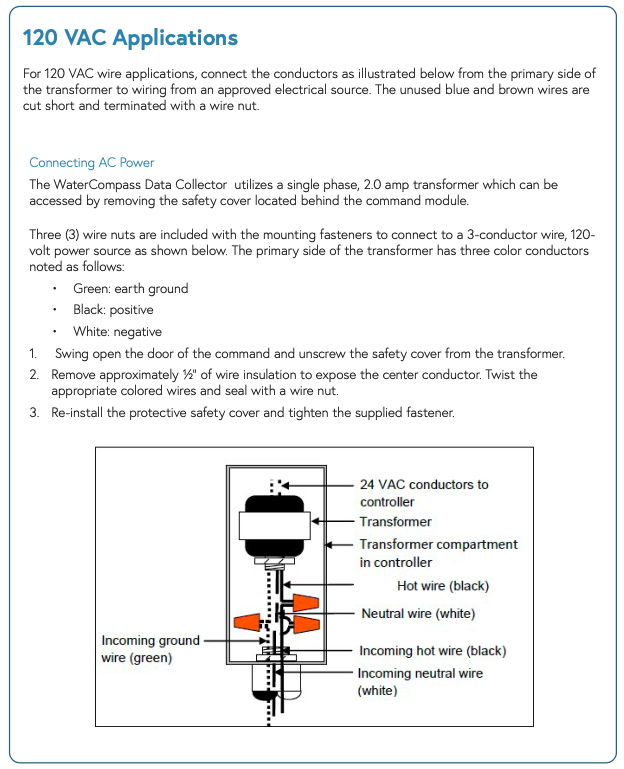
Step 2: Connect the Data Collector to AC Power
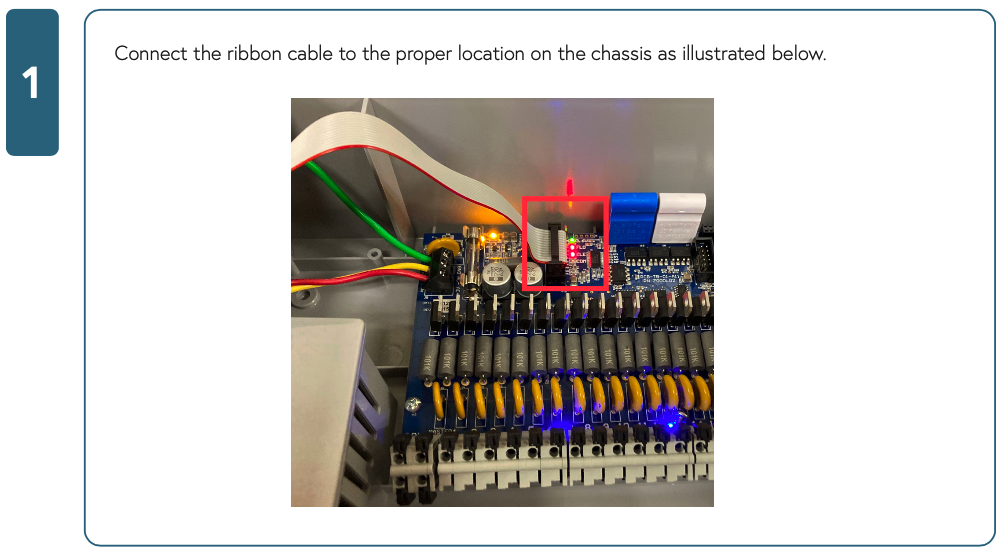
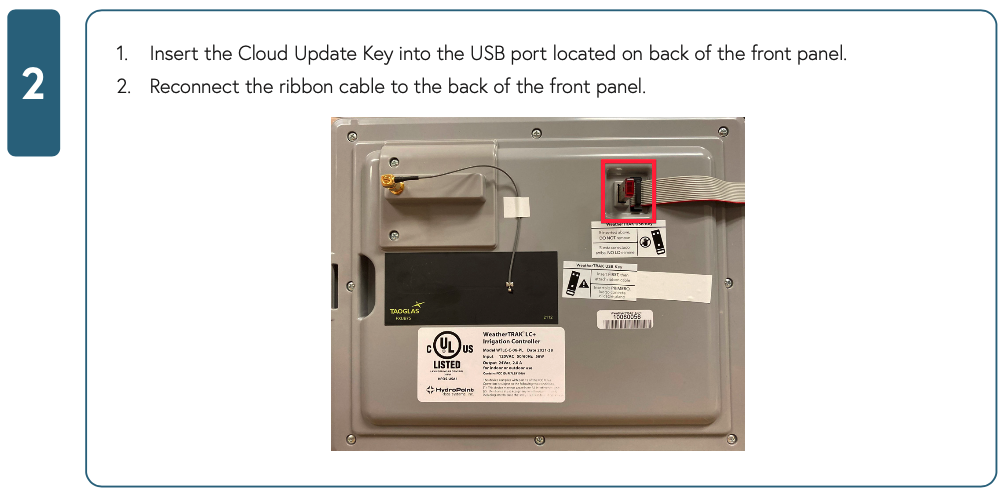
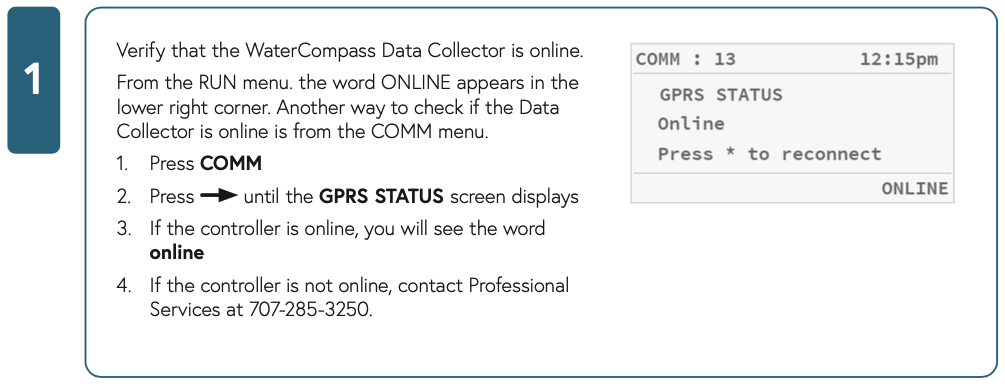
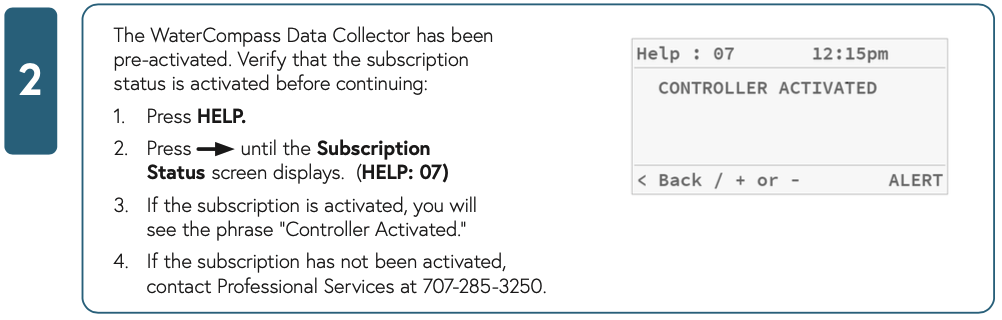
Step 3: Verify Data Collector is Online & Activated
Phase 2: Flow Monitor Installation
Step 4: Choose a Location to Install the Flow Monitor
Step 5: Attach the Flow Monitor to the Pipe
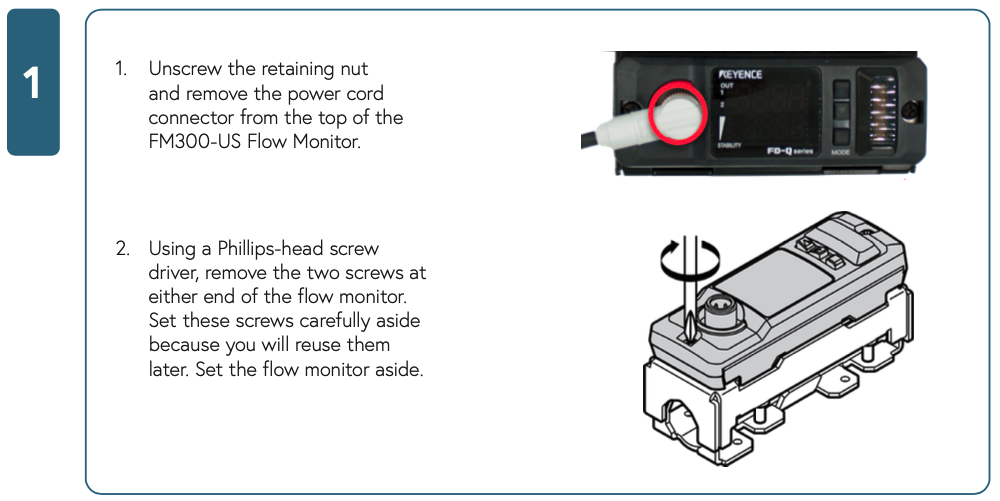
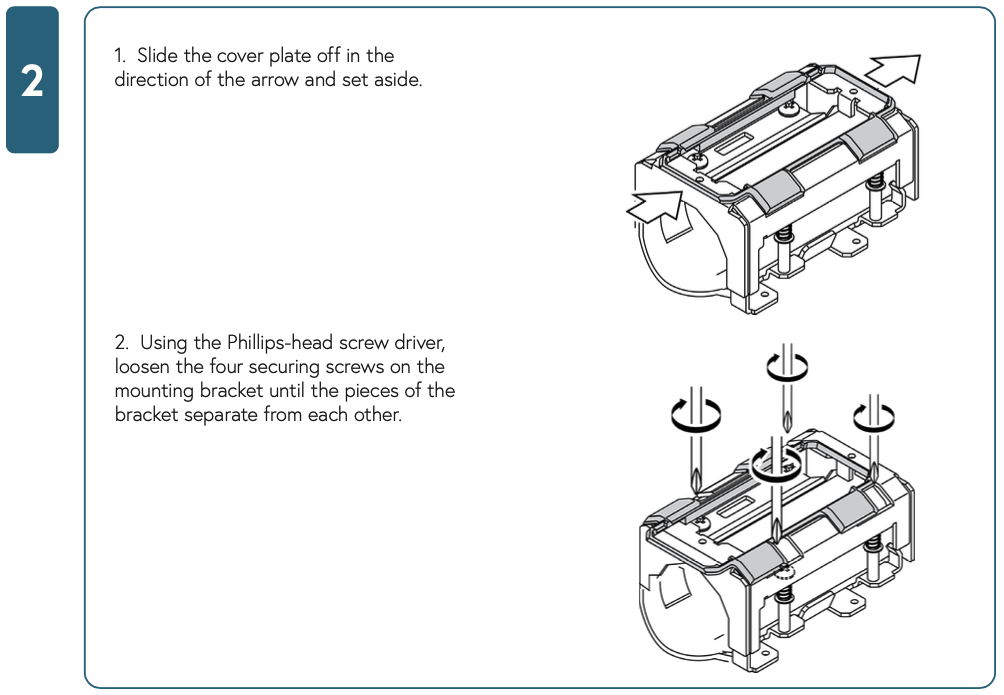
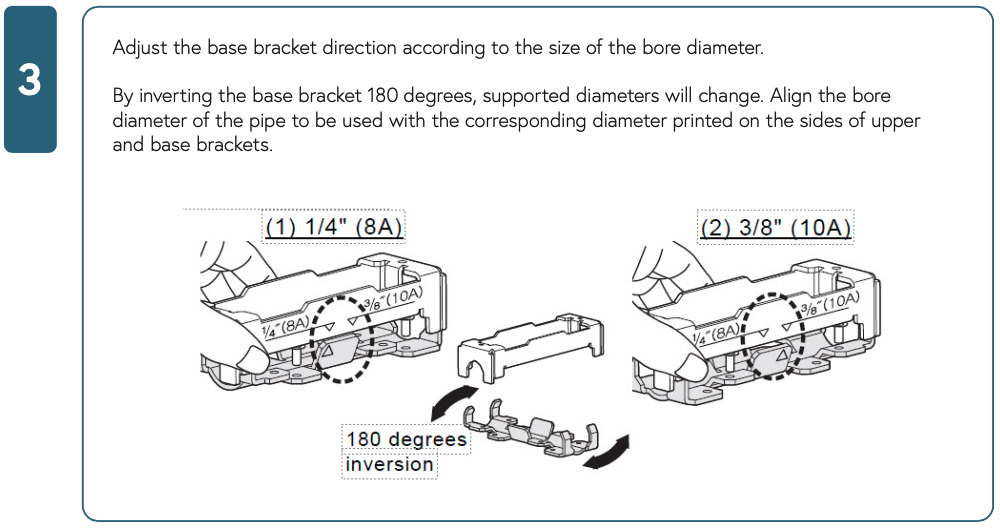
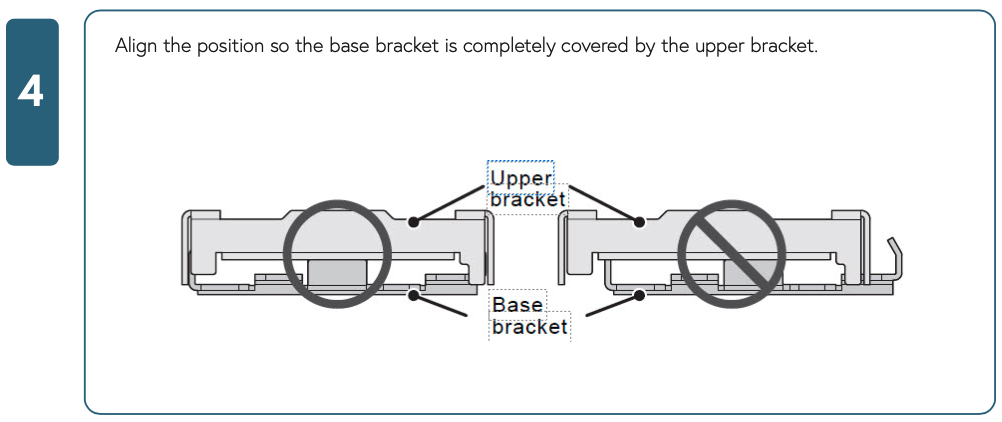
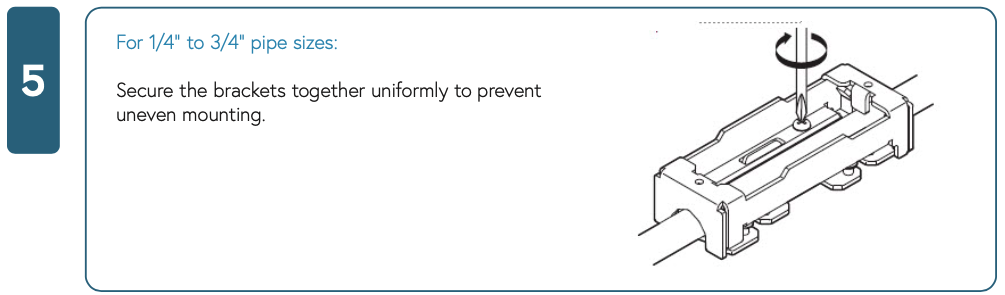
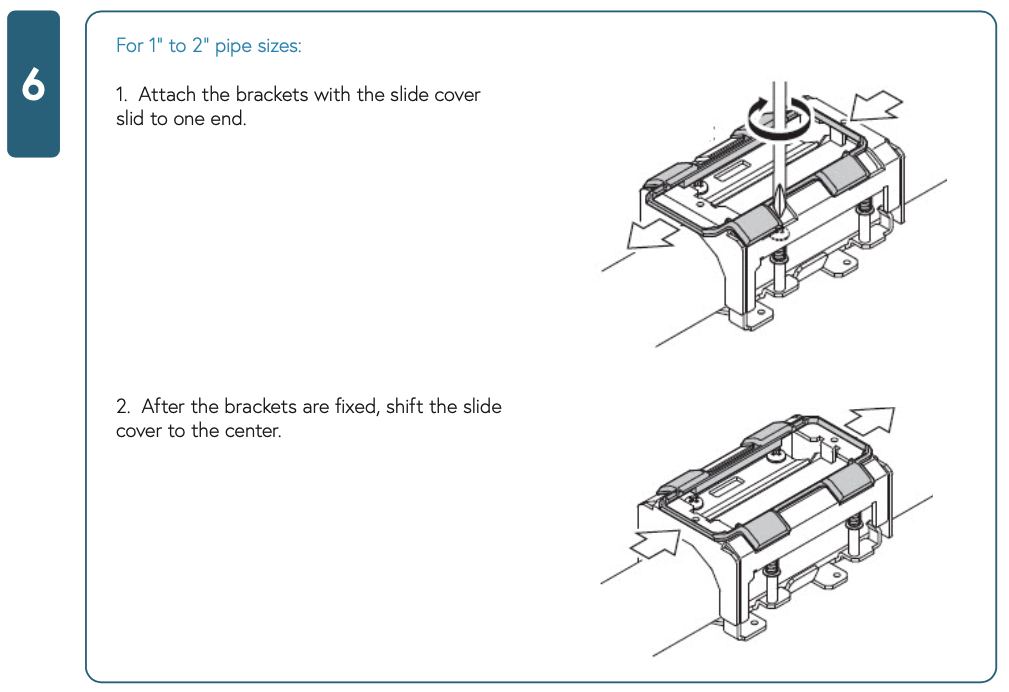
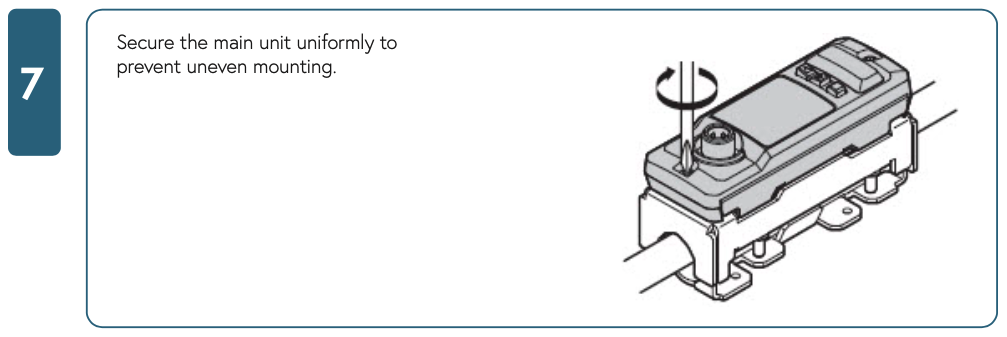
Step 6: Connect Flow Monitor Sensor Wires to the DC
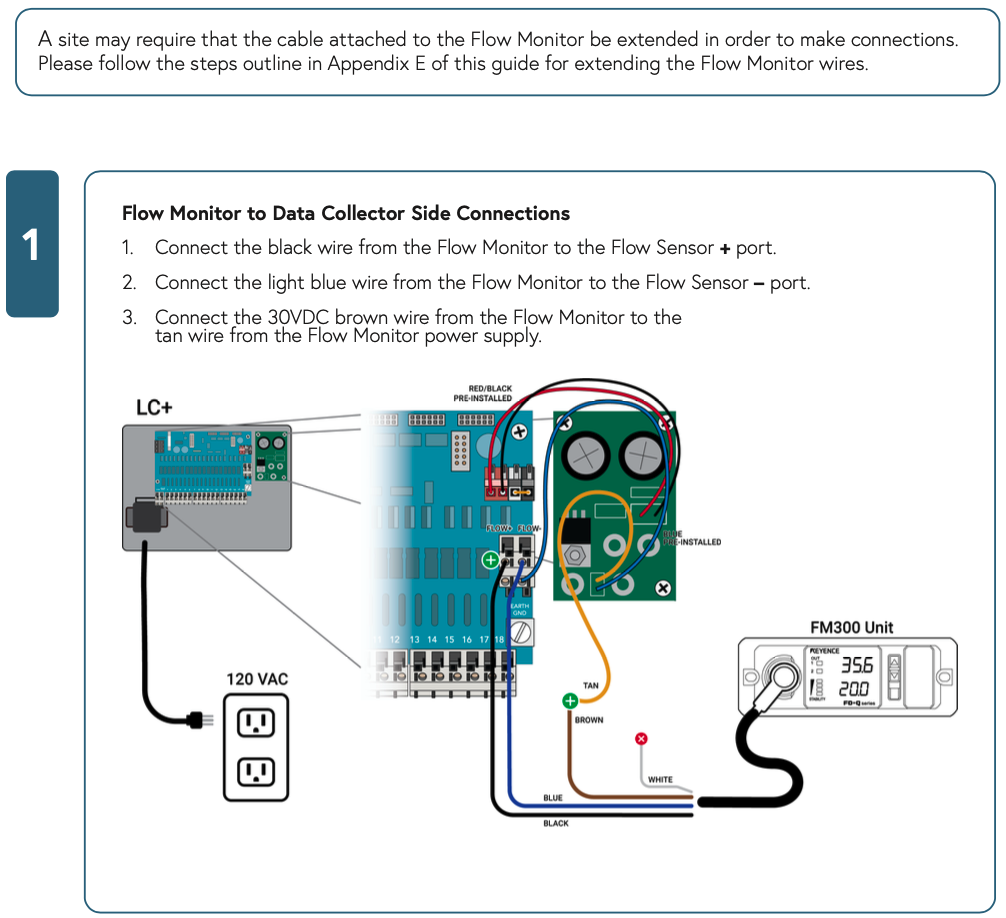
Phase 3: Flow Validation
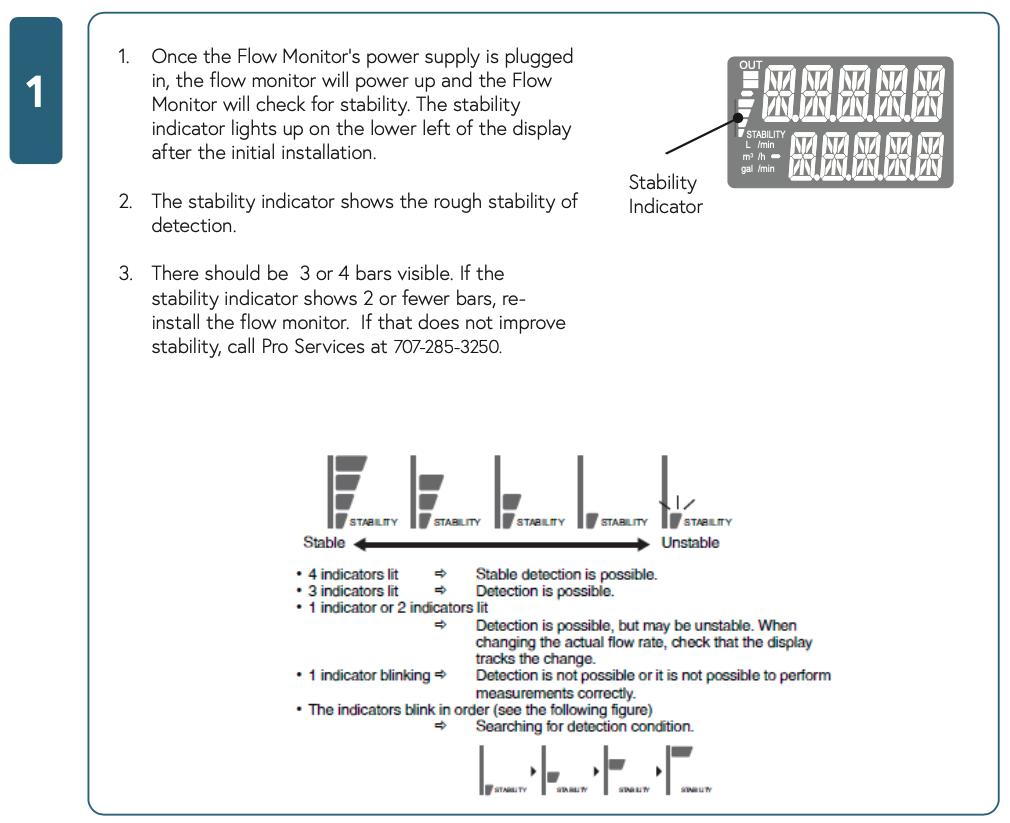
Step 7: Validate Proper Flow Stability
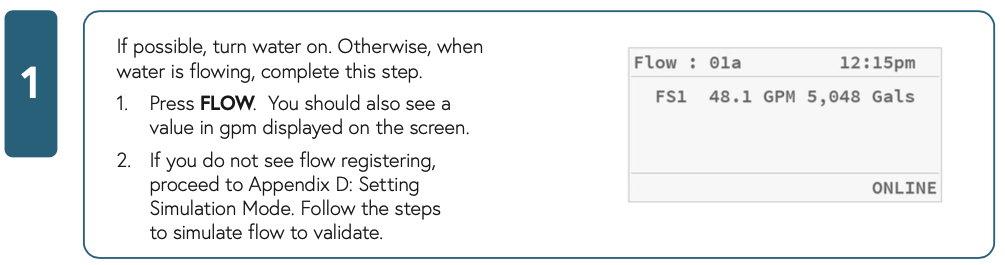
Step 8: Validate Flow on the Data Collector

Appendix
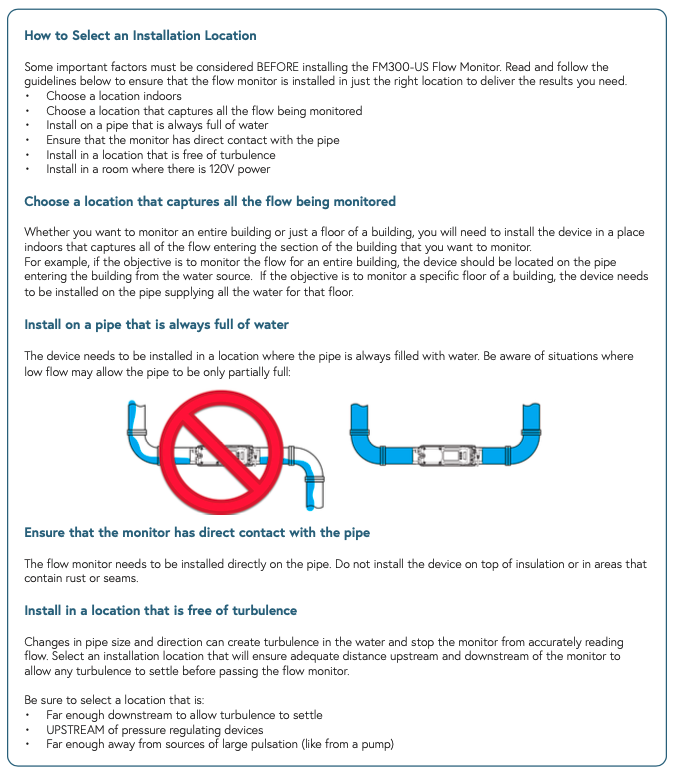
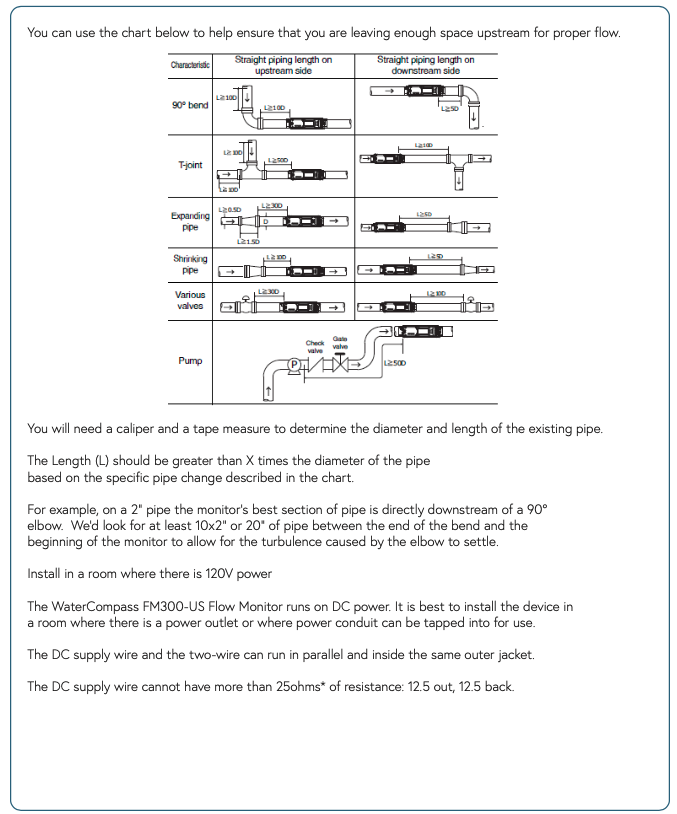
Appendix A: Selecting an Installation Location