
Controller Over-the-Air (OTA) Firmware Updates
Purpose: This process will outline how to push an over the air (OTA) firmware update to a controller through WeatherTRAK.net.
How to find the controller's current firmware version?
use or direct customer to this link.
Related Resources
Customers will use this link to update their firmware.
Requirements
| Firmware Version | Necessary Action |
| less than 7.8 | the controller must have a USB cloud update key purchased/ installed. |
| 7.8 and higher | firmware can be updated OTA |
| 7.10.5 | is required for LTE/4G functionality |
| 7.14.1 | is current version added to Support Verizon SIM. It is available for download |
| OptiFlow | all firmware will suffice as OptiFlow Key is OTA compatible |
| Product SKU | for latest firmware version by product SKU see Firmware Updates |
Procedure:
1. Identify the times when the water window occurs. You will need to know the start and end time so you can schedule restarts accordingly.
2. Log into WeatherTrak.net.
3. Under the Admin tab, click Admin Tool.
4. Click the Controllers button. In the serial number field at the top of the screen, enter in the serial number of the controller that is to be updated. You can also view all controllers and sort by fields to narrow and click the correct result. For example, you can sort to get results based on firmware version, bootloader, CPU type, name, platform, etc.

5. Check the CPU type in the CPU Type Name column. The two types of CPU that are available for firmware updates are M5 CPU and M6 CPU. “Unknown CPU” indicates the current firmware version is below the required level for a successful update.

6. Select the desired controller by checking the box that displays under the Account Name field.
Note
If there is not a checkbox to the left this means that the controller is not available for an OTA update.
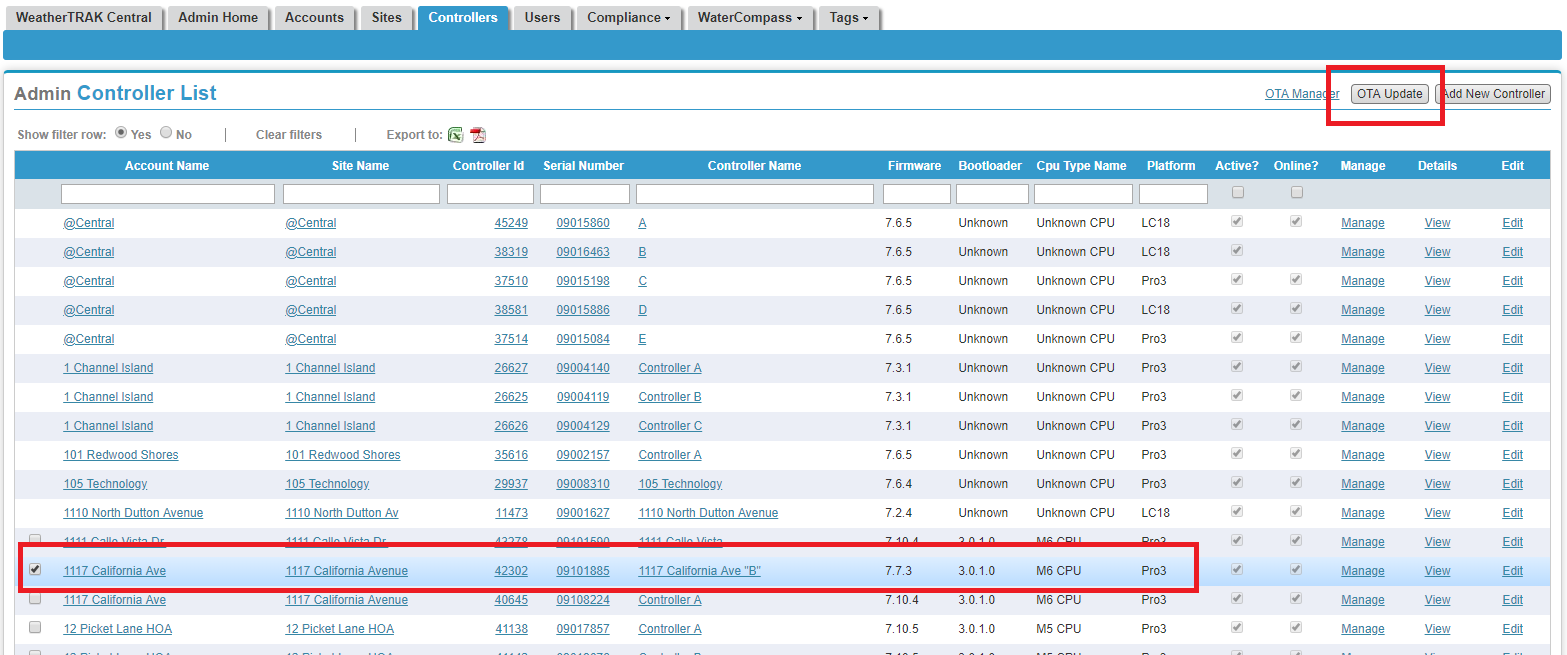
7. Click OTA Update on the upper right corner of the screen.
8. A pop-up displays. Use the drop-down tab to select the correct Application image that matches the CPU Type on the controller. Note: Do not use or select the Bootloader image.
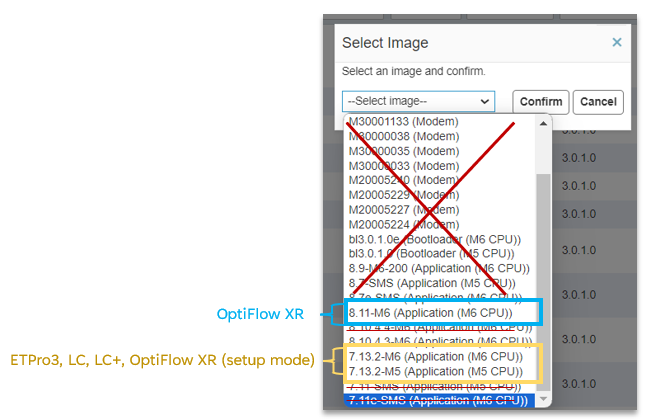
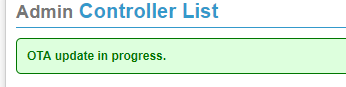
9. Click Confirm. The download will begin. A green confirmation message will display, letting you know that the OTA update is in process.
10. After the update has begun, you can check the status in the Admin OTA Manager.
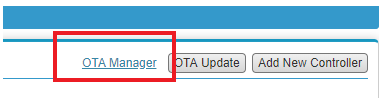
The status of the controller will be in the Controller State column. If you get an Error: Missing USB, the controller will more than likely have a HW Alert that will need to be addressed before it will allow you to continue the update.
Once the controller begins to download it will show as Download in Progress. You can check the percentage of the download under the Progress column.
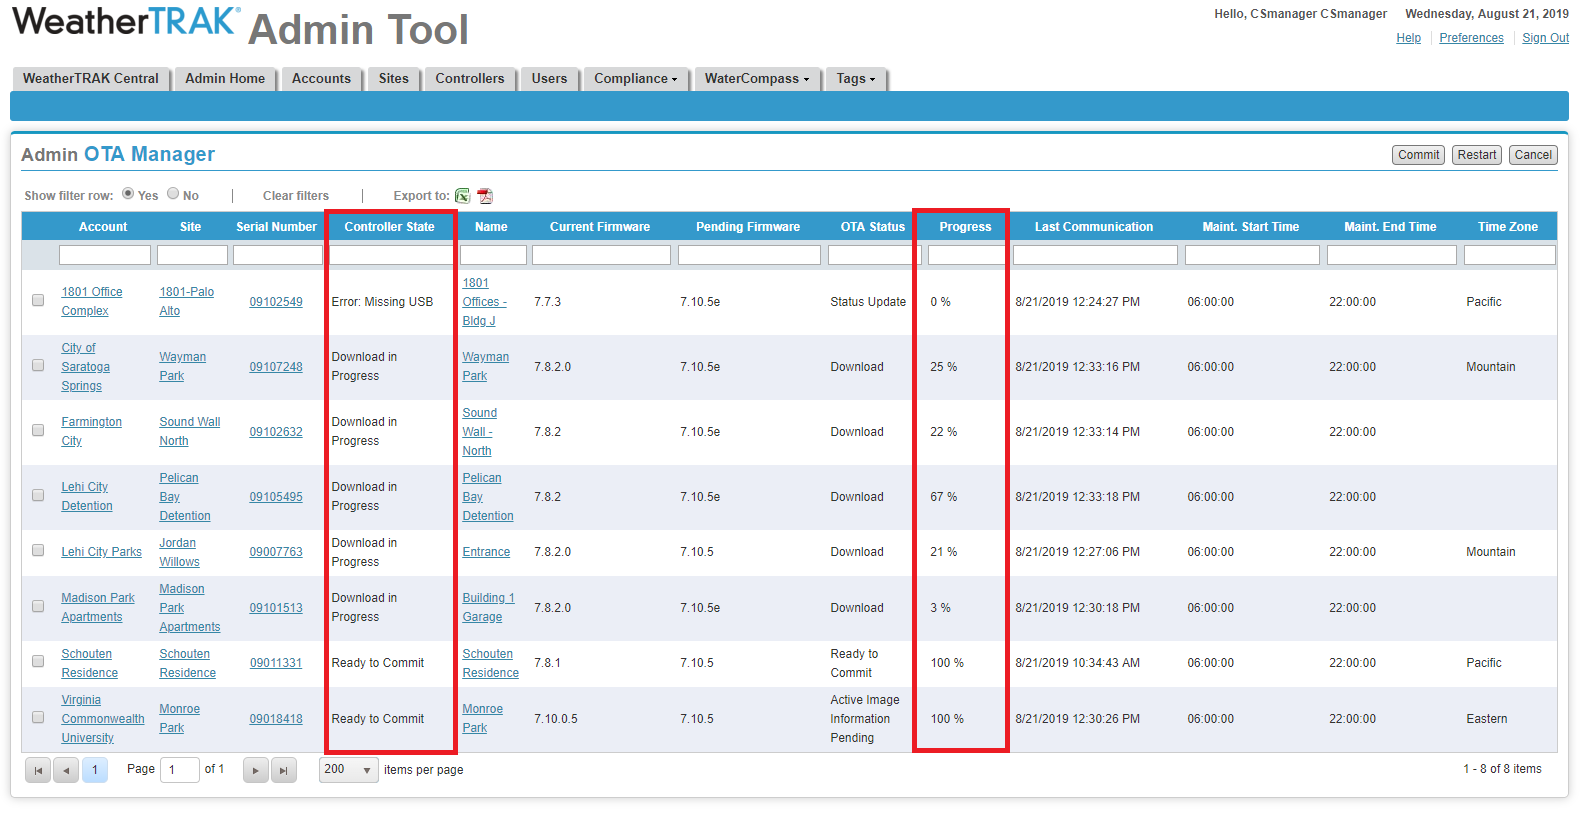
11. When the Download is complete, under the Controller state it will say Ready to Commit. To commit the controller to the firmware update, select the box next to the controller on the left side of the account and then go to upper right on the page and select Commit.
Caution
Be aware that 7.x controllers will restart once the commit button is pushed, so be sure that the controller is within the Maintenance Window before proceeding. 8.x controllers will queue the request until the window is open. After you select the commit button it will send a message to the controller to reset and finish the update.
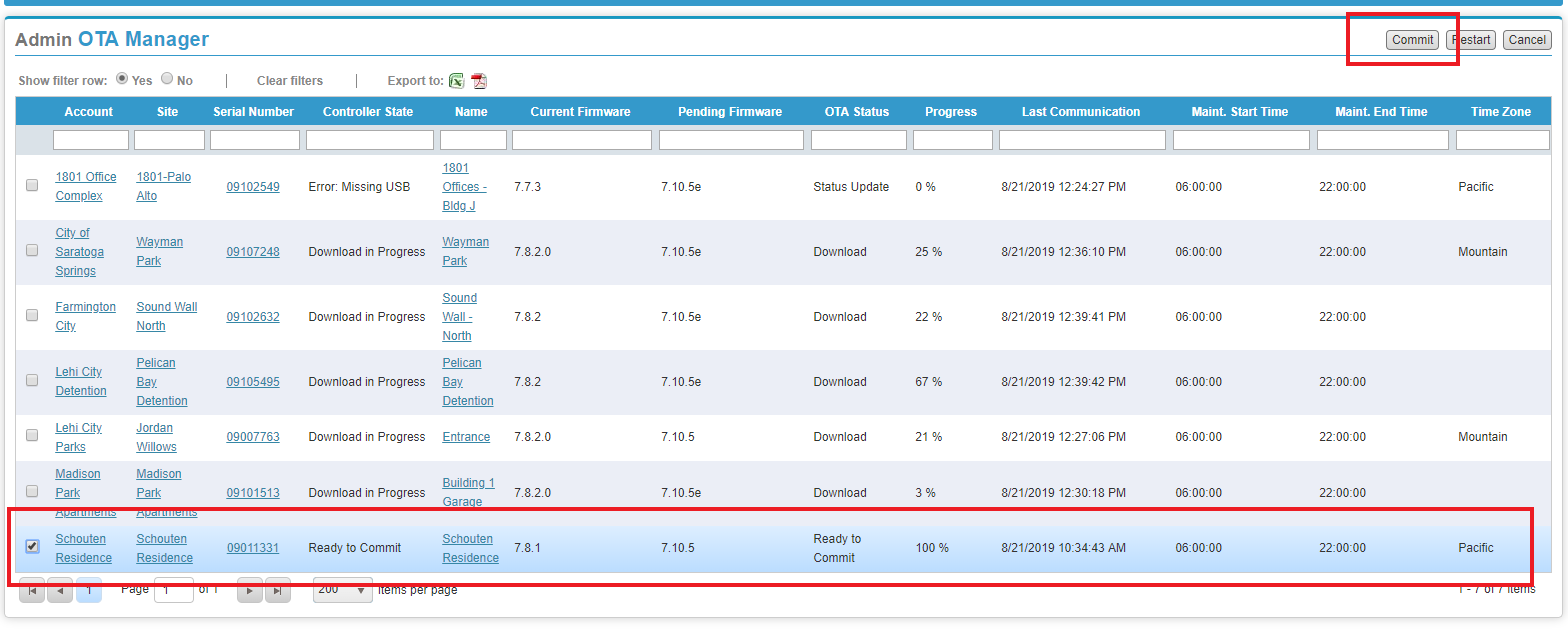
12. After the update is successfully completed, the controller will clear from the OTA manager. You can then go back to the Controller tab and enter the serial number to verify the firmware version has been updated.
If you encounter any issues or have questions, please send them to escalations.