

This article outlines the full process for creating a WeatherTRAK RMA in Salesforce. BeforeThis article outlines the full process for creating a WeatherTRAK RMA in Salesforce. Before proceeding, review the following return exceptions, as they impact how the RMA must be configured.
Important - Review before creating an RMA
Certain WeatherTRAK replacement parts do not require a return by default. However, if there is any reason to suspect a defect, recurring failure, or abnormal behavior, support agents are authorized to override no-return exceptions when investigation is warranted.
Exception Items (Require No Return):
- Cloud update Keys: (requires no return) Shipping method = USPS first class mail
- Transformers: (requires no return)
- Ribbon cables (requires no return)
- Station keys (requires no return)
- (Legacy) 2G & 3G modems: (requires no return)
- H2O 2-wire decoders: (requires no return)
- Tucor Decoders: (requires no return AND DBYR connectors to be added to the order - 4 per decoder)
- Hydrometers Registers (requires no return)
- SIM Cards (requires no return)
When requesting a return for an exception item:
- Configure the RMA accordingly in Salesforce
- Email the appropriate warehouse team (Vince Mills) to request closer inspection or special failure analysis
⚠️Failure to follow these guidelines may result in delayed shipments, incorrect RMAs, or unnecessary returns.
City of Santa Clarita - Required RMA Shipping Information
⚠️ This information must be used exactly as listed when creating WeatherTRAK RMAs for the City of Santa Clarita. Do not substitute or modify!
City of Santa Clarita (Non‑Parks / City Division) Shipping Contact:
Name: Lucas Lopez
Email: llopez@santa‑clarita.com
Phone: 661‑670‑9640
City of Santa Clarita – Parks Division Shipping Contact:
Name: Angel Caldera
Email: acaldera@santa‑clarita.com
Phone: 661‑290‑2228
Delivery Address (Same for City & Parks Division)
25663 Avenue Stanford
Santa Clarita, CA 91355
WaterCompass RMA
For any WaterCompass device RMA requests that come to support. We will redirect them as per the following from David Taylor:
All issues related to data collectors are to be managed by our Professional Services team as an integral part of the WaterCompass service. Please note that the WaterCompass hardware is the property of Hydropoint, and its maintenance and components should not be handled or replaced by the customer.
The process for replacing data collectors should adhere to the standard RMA procedure. The dedicated CSM should initiate this process by submitting the requisite FSR to our Professional Services department. They will, in turn, be responsible for replacing any defective hardware. The entire data collector should be replaced as part of the RMA.
Data collectors that require replacement will be shipped back to our Petaluma facility, where they will undergo necessary part replacements, updates, and maintenance to prepare them for deployment in another WaterCompass project
It's worth noting that there is a need for substantial improvements in the management of the FM300 product, including clarifications of SKUs and the establishment of comprehensive process documentation. I am committed to addressing these deficiencies once WaterCompass Next Gen has been fully deployed.
In the interim, please don't hesitate to reach out to me with any inquiries or concerns regarding WaterCompass replacements. Thank you.
Respectfully,
David Taylor
💡Make sure to read Hydropoint RMA Processes
1. In Salesforce > From the Initiating Service Request > click Create RMA.

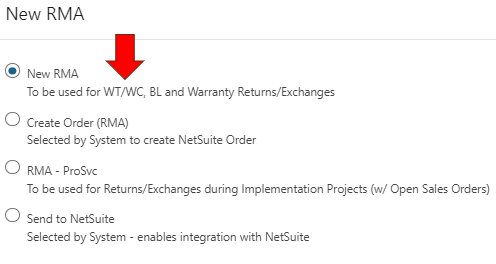
Salesforce will re-route you to the new RMA record and will auto-populate the following:
- Initiating Service (Case Number)
- Status
- Main Contact
- Asset Details
- Account and Site Account
- Diagnostic Details
Before proceeding, ensure you have gathered and reviewed all the necessary information and validated the warranty details. Best practices should include the following:
- Verify product warranty coverage.
- HPDS Product Warranty Policy
- Check for complete and accurate field notes/troubleshooting documentation, diagnostics.
- Ensure diagnostic results make sense and correspond to the parts being ordered/replaced.
- Verify you have all necessary contact/caller information.
- Be aware of Jitterbit integration timing found at the end of this guide.
- Be aware of shipping schedules and cutoffs (2pm mst Baseline and 3pm MST for WeatherTRAK)
- Double-check everything before submitting!
2. In the RMA Reason field, click the drop-down arrow to choose a reason for the return, then click Save at the top of the screen.
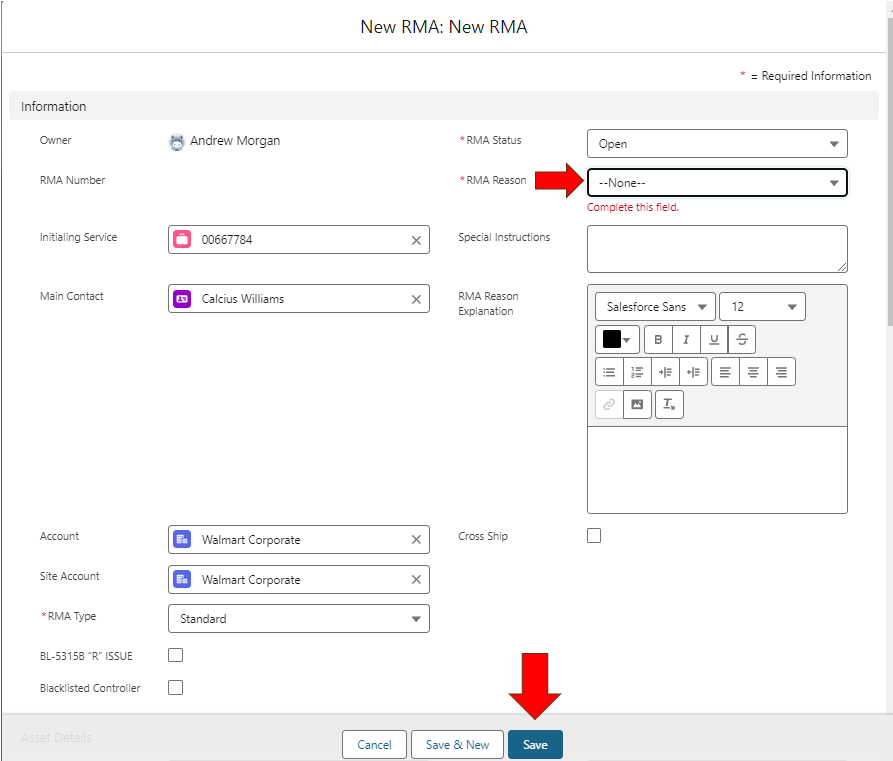
Data from the Service will be passed to the new RMA Request.
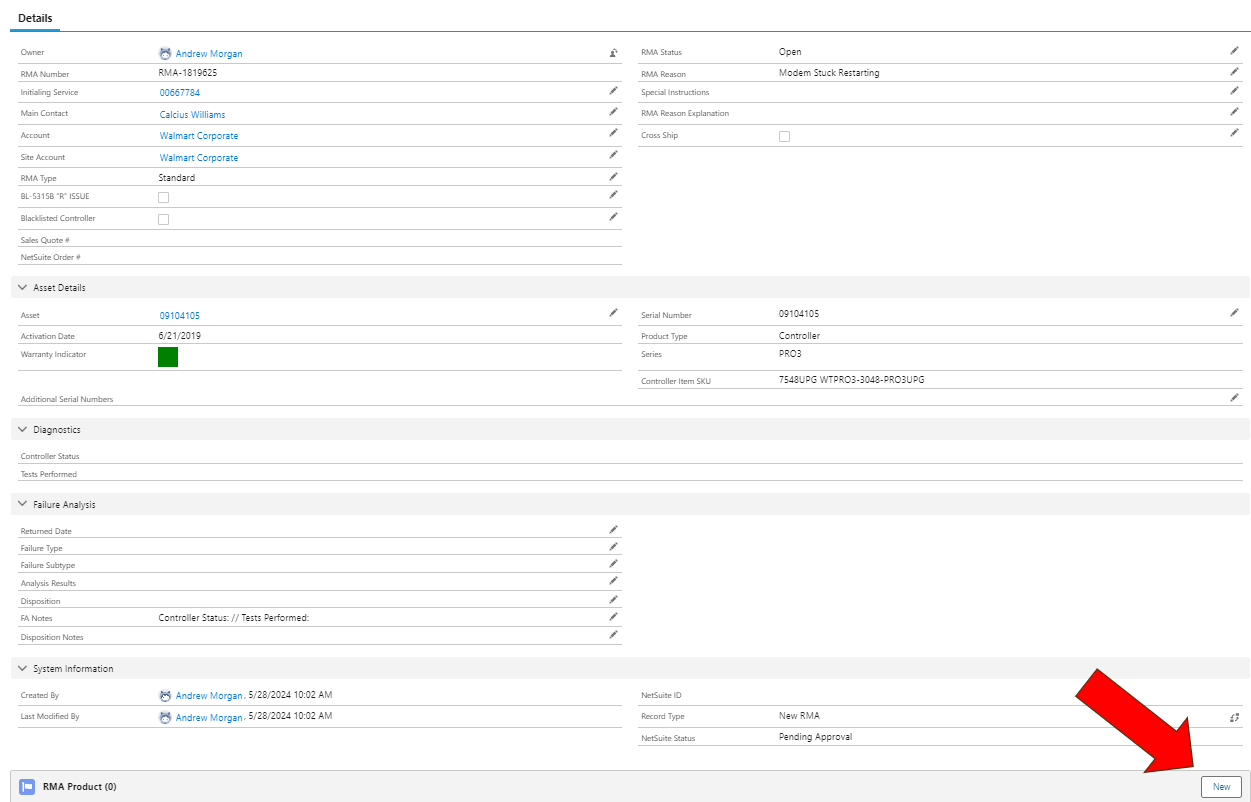
3. After the data has been reviewed and/or updated as needed, click the New RMA Product button to add the product being returned. All billing, shipping, and contact information should be compared between Salesforce and Netsuite to ensure it is in sync. If there are any discrepancies found they will need to be corrected.
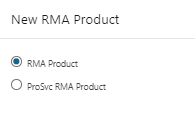
4. In the Product field, use the lookup function to locate the product being returned. Key words can help find the product.

5. In the Expected Quantity field, enter the number of items being returned.
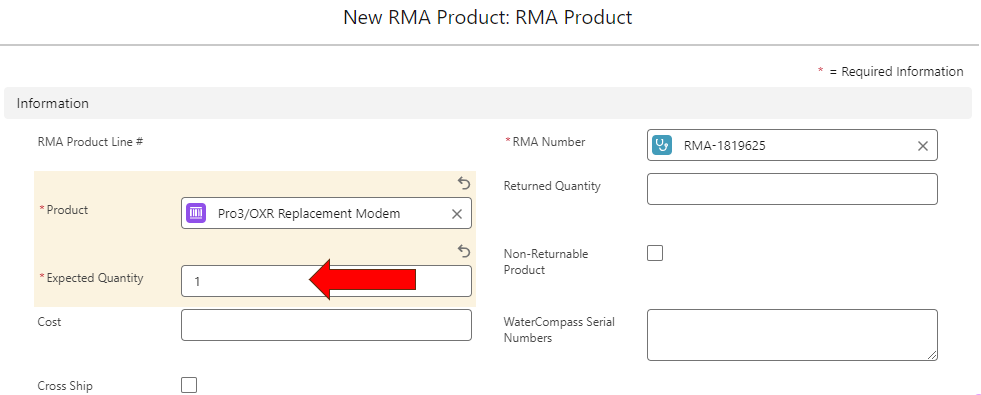
6. Click Save. If you have more than one product being returned, click Save and New.
7. Click on the RMA Number tab and Salesforce will route you back to your RMA Request.
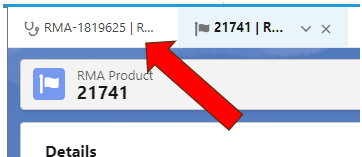
8. Adding an RMA product for a weatherTRAK RMA will triggers Jitterbit to create a “return authorization” in Netsuite. To review the record that was created in NetSuite, place the Salesforce RMA number in the global search field in NetSuite and click search (jitterbit processing time < 2hr). A copy of the Salesforce RMA will be located in NetSuite:
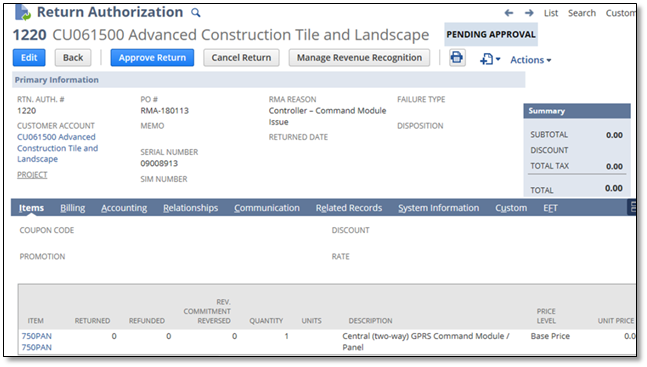
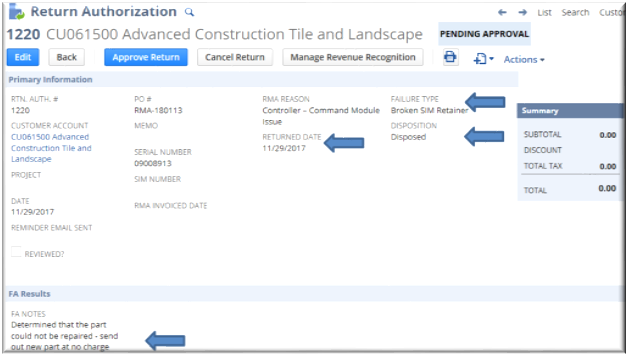
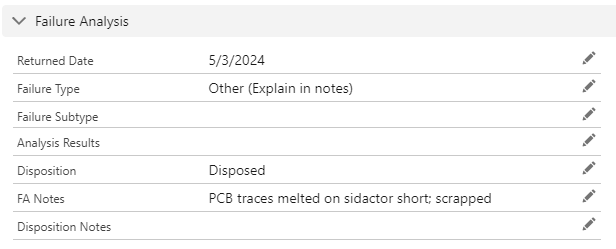
All returns will be approved by our Order Management Team. After the product has been returned, our Failure Analysis Team will review and update the NetSuite record with the final findings.
When the product is returned and/or Failure Analysis is complete, the field values will pass from NetSuite to Salesforce.
Sending Replacement Parts through Salesforce
Note
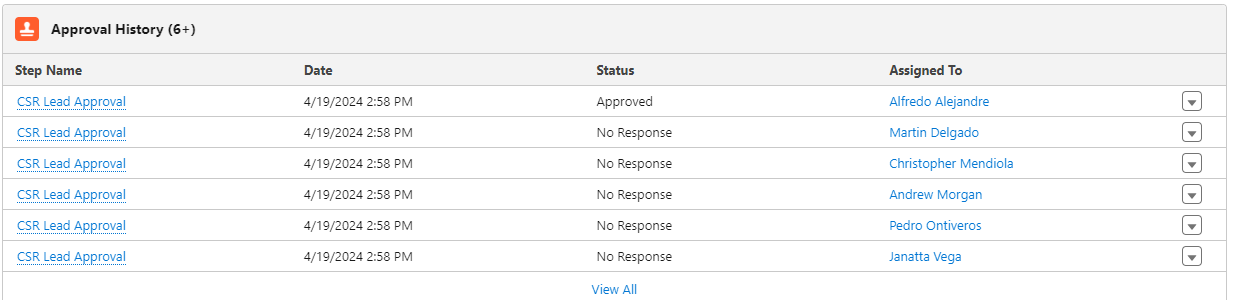
The process that triggers Jitterbit to push an order from Salesforce to Netsuite for processing is when the order is approved in Salesforce.
1. From the Salesforce RMA record, click Create Order.

Salesforce will re-route you to a new RMA order record. The system will auto-populate the following:
- RMA Number
- Status
- Initiating Service
- Asset Details
- Site Account
- PO Number (RMA number)
2. Complete the following fields:
- Account
- Order Start Date
- Bill to
- Ship to
- Any other required or applicable fields
Best practices for shipping details should always include the following:
- Verify customer contact, billing, and shipping information is entered correctly according to the information provided
- Validate info against Salesforce & NetSuite data.
- Validate shipping address against USPS.COM. Note: Do not rely solely on a Google Map result populating in Salesforce.
- If shipping to an address location with multiple suites, departments, buildings, etc. be sure to confirm/ add the location description in the shipping details. Examples: Mall Office, Grounds Maintenance Department, Suite 110
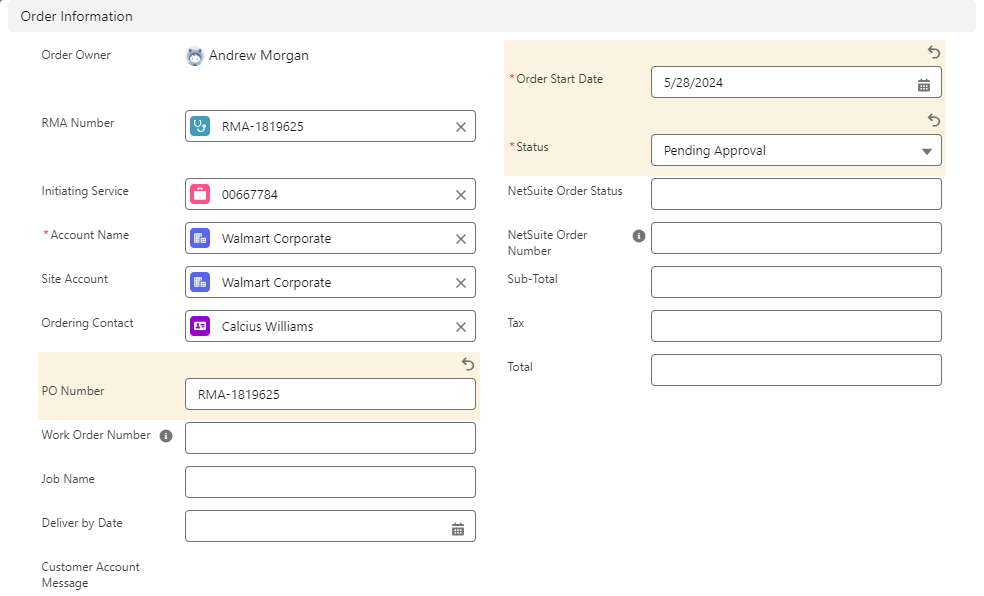
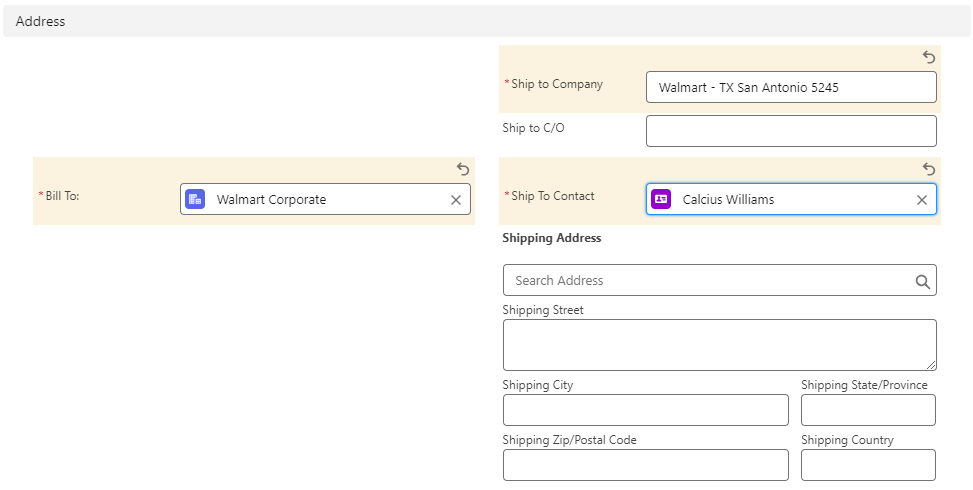
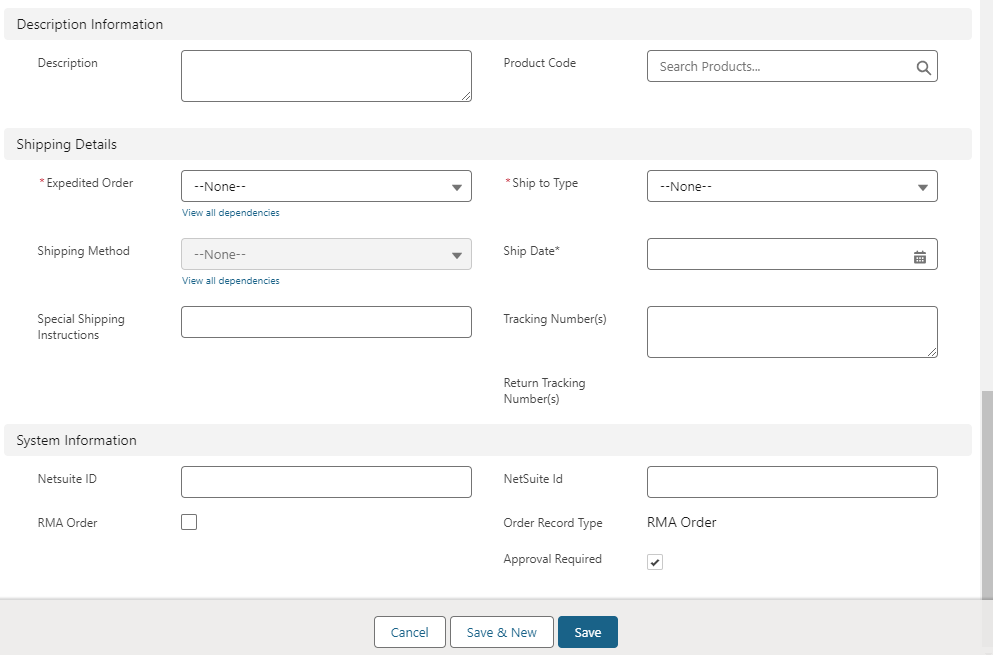
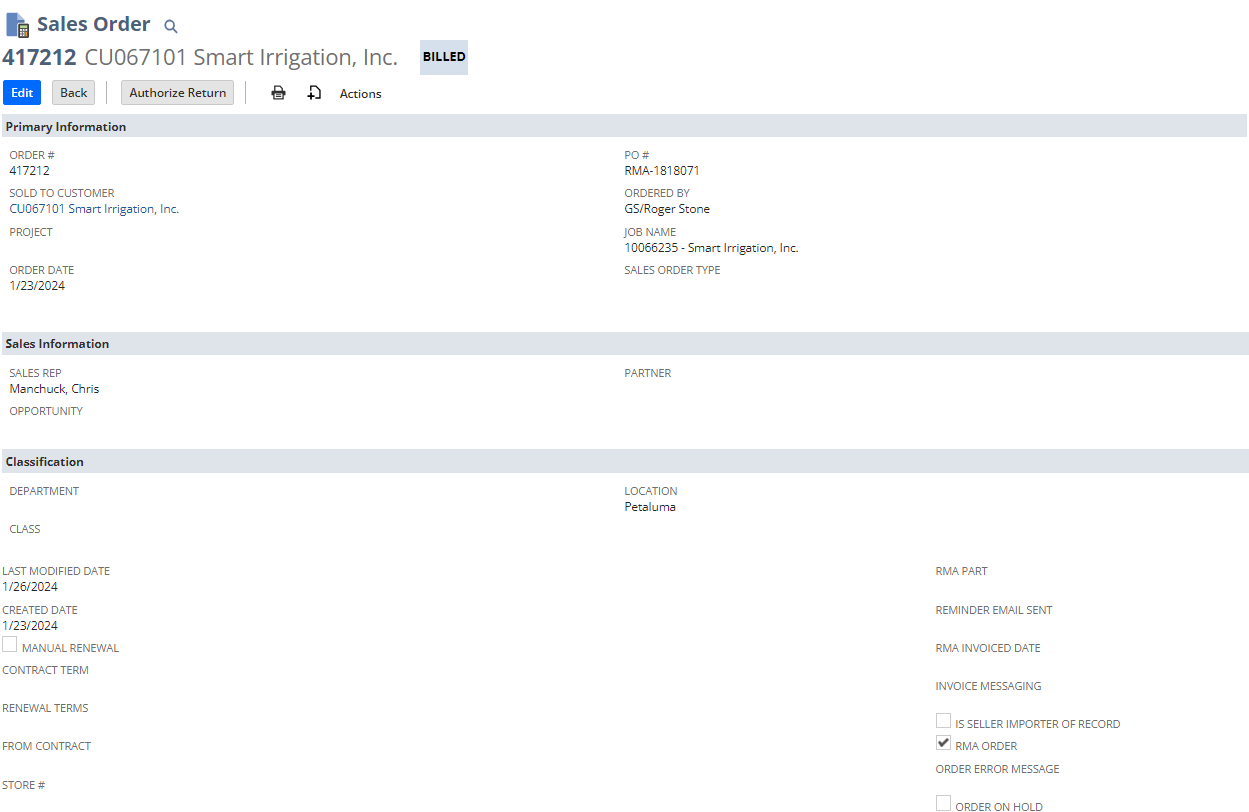
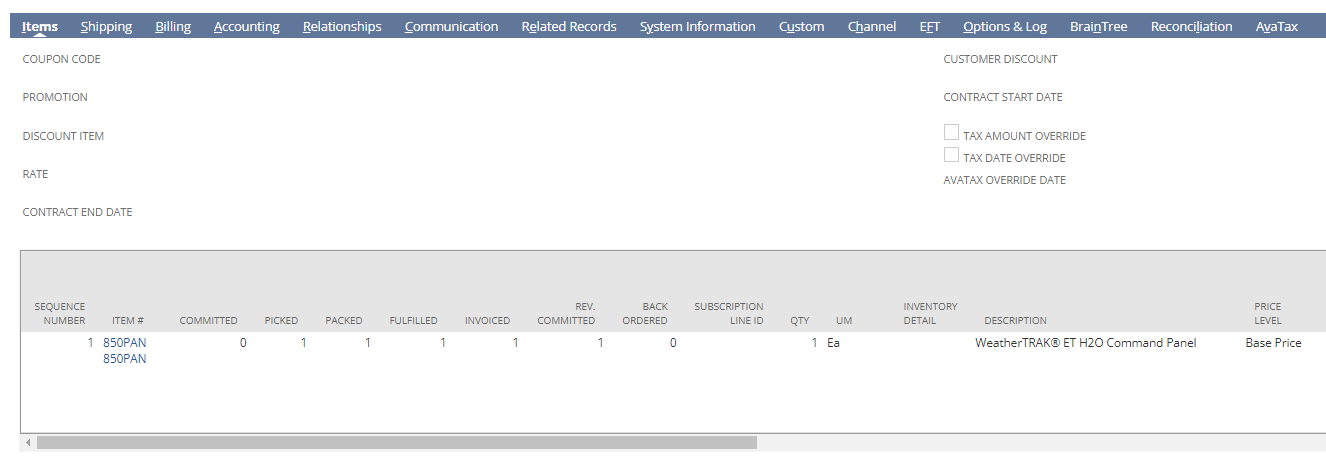
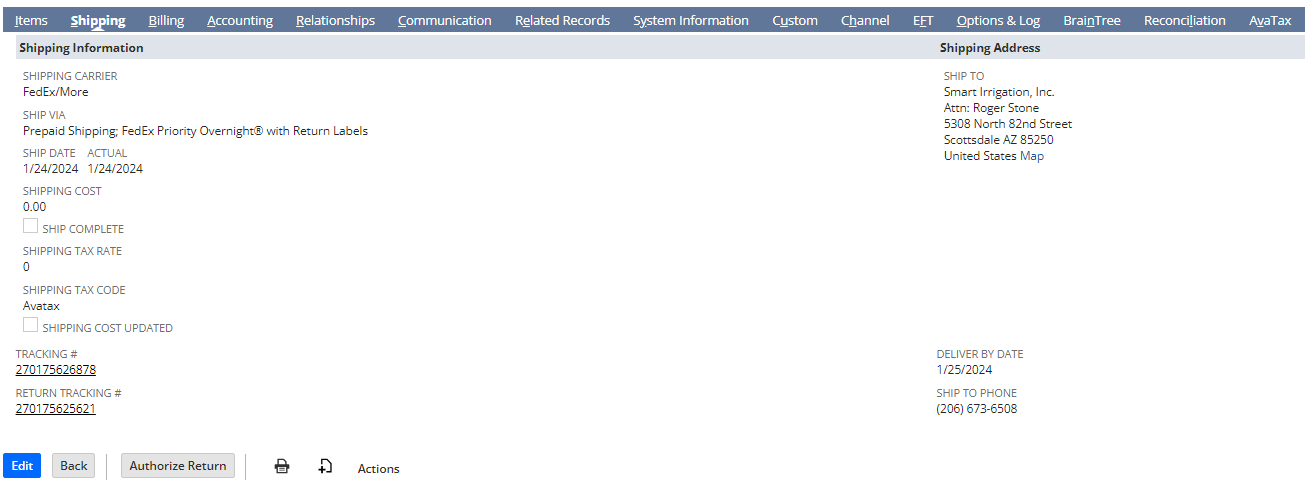
Below are screenshots of what to expect when verifying shipping information.
- The PO number field allows us to specify that this is not a purchase order but an RMA warranty order. Type in the RMA# as its shown in the example.
- Choose an order start date as today.
- Ensure the status is “pending approval”
- Note that after you click save, you will likely need to re-enter the ship to company and ship to address since Salesforce will automatically pull the information from the contact record which may not be the intended information to use. Use the “search address” feature to find and enter it more quickly. The billing address will auto populate with what is in the company/account record.
- The only other required info to input are the “shipping details” fields. Review each and every detail after clicking save as it may revert to auto populated information from other records requiring you to re-enter and click save again.
- The email address associated with the ship to contact will get the auto generated RMA notifications.
Salesforce:
NetSuite:
3. Click Add Product. If needed, Leverage key words to help find the correct product.

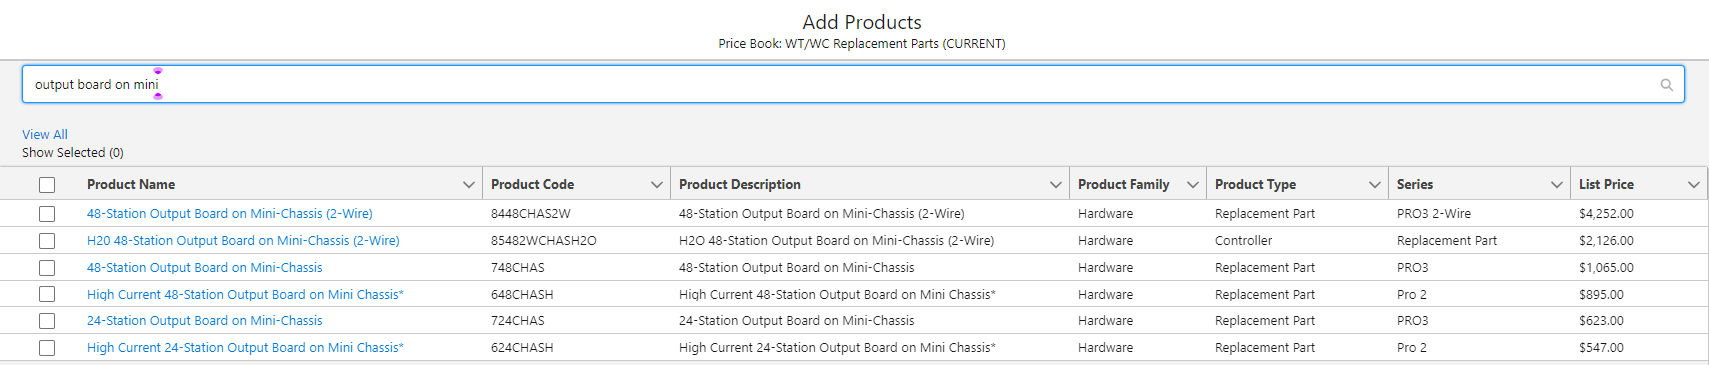
Ensure you are sending the correct part(s):
- Validate that the product added matches the asset info/install base. Using the BOM (bill of materials) in netsuite can help but is not a 100% full proof method. This is because not all part #'s in a BM are replacement part #s.
- Check if new Optiflow keys are needed for the Pro3 running Optiflow. Add accordingly. Keys are tied to a device and cannot be reused on a different panel/faceplate.
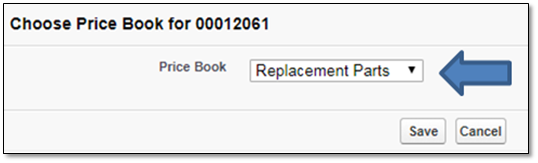
4. From the Price Book field, select Replacement Parts from the drop-down list. (WT/WC replacement parts)
5. Select the product to be added to the order. You can filter the options by product family, product type, or series or use the keyword search to plug in the product code (or partial) if known. If the product is not found, verify in the replacement catalog or contact Jennifer Elu (Quote & Order Services Manager) to help validate the part number to be added.
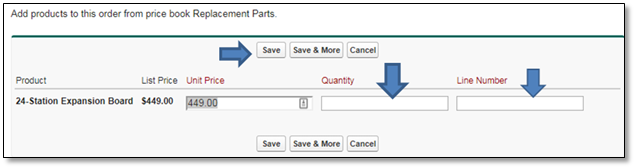
6. Enter in quantity, line number, and update sales price as needed. and press Check to ensure the appropriate cost is applied (warranty items should be $0, non-warranty items should be charged accordingly.
- Also double-check that the diagnostic results from the field notes correspond to the parts being ordered/replaced.
- Validate all correct parts (SKU’s) are applied to the sales order and confirm against the asset info/install base.
- the line number is for when we send multiple parts. The 1st part we send would have line number = 1, the 2nd part we send would have line number = 2 and so forth.
- Double-check everything for accuracy before submitting! Click Save.
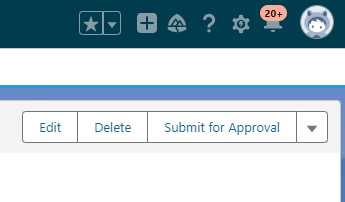
7. Click Submit for Approval to submit the order for internal review and approval. The support agent should close their support case once the order is submitted for approval. If correction are needed an approver will contact the submitter and help them as needed.
Validate with the order management/ fulfillment team if there are any questions/ concerns, or special considerations related to the order. Approval status can be tracked by scrolling to the bottom of the order page layout.
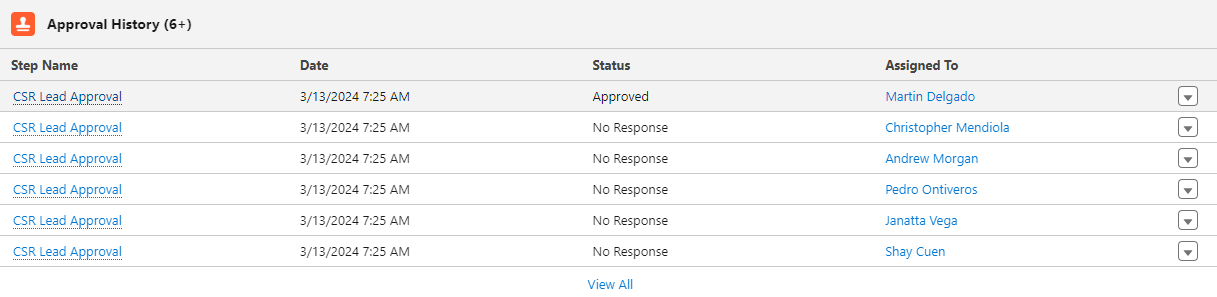
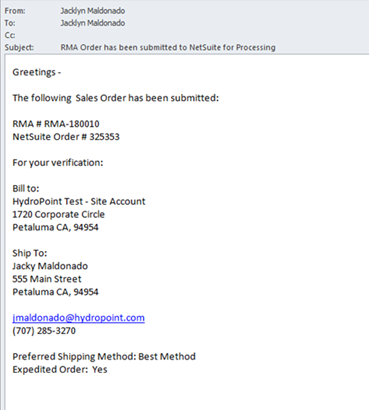
When the sync is complete an email notification will be sent to the Orders Team, alerting them of the order pending approval:
As the order moves through the standard process in NetSuite, the Salesforce Order record will update accordingly.
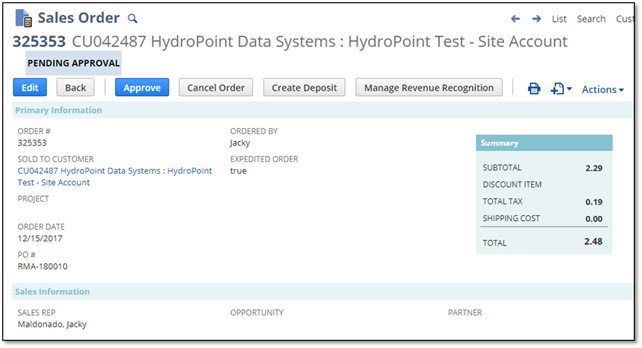
Once the order has been submitted to NetSuite, NetSuite becomes the “owner”. The order process has not changed, other than who prints copies of the orders.
- All orders are approved in NetSuite by ??
After the order is approved in NetSuite, the same email notification will be sent to the Operations Team, alerting them of the order pending fulfillment.
- All WeatherTRAK orders are fulfilled and shipped by Tammy Svara. She would be who we work with for any unique situations.
Finally, after the order ships, the order status is updated to Pending, Billing, or Billed in Netsuite.