
Add a New User
Step 1: Login to WeatherTRAK.net Admin
- WeatherTRAK.net
- Login Credentials:
- Username: WCMS
- Password: Savewaternow
Step 2: Navigate to the Admin tab and select “Admin Tool”

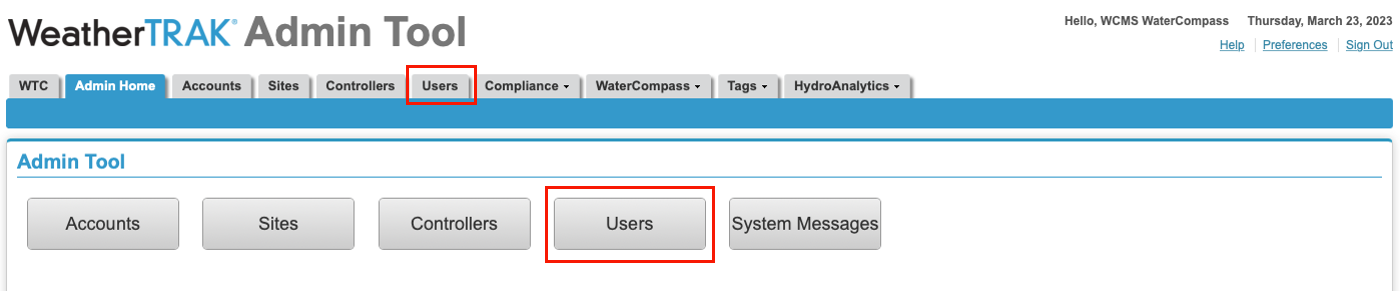
Step 3: Navigate to the “Users” Tab
- There are 2 ways to navigate to the “Users” tab
- Select “Users” from the admin tool menu
Step 4: Add New User
- Click on “Add New User”
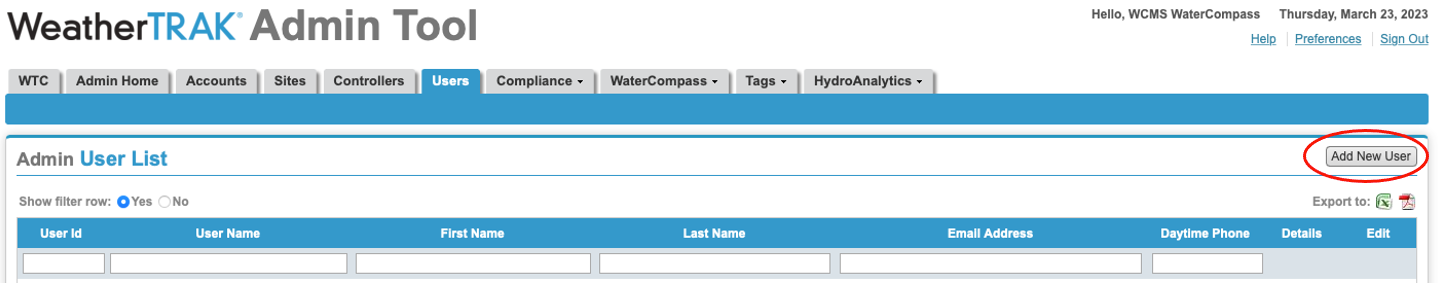
- Enter User Information
- First Name
- Last Name
- Email Address
- Select “Copy E-mail Address” link under the User Name field
- Click Save and exit
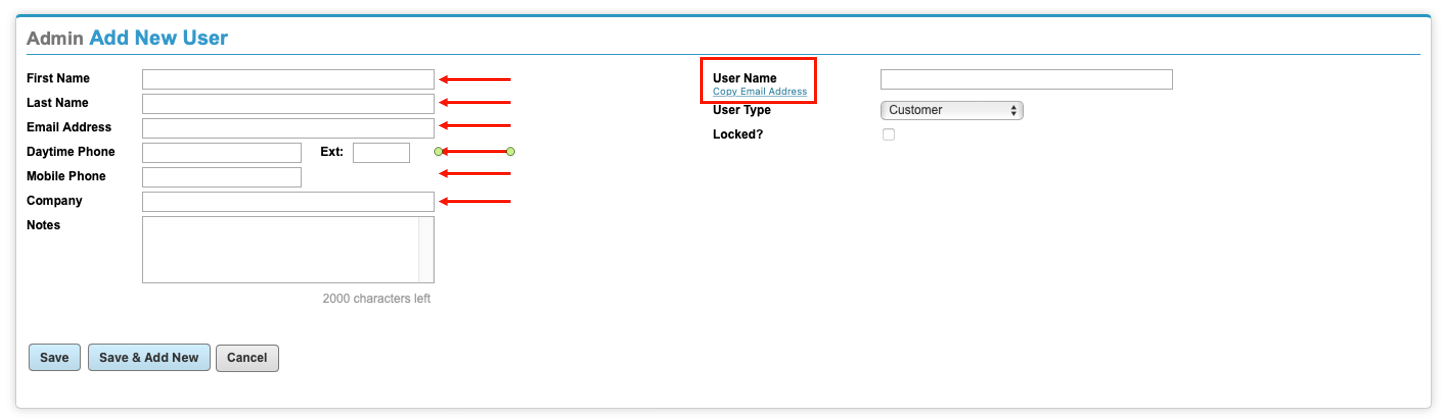
Step 5: Assign Accounts to the User
- Navigate back to the “User” tab containing the full list of users
- Search of the new user added to the system
- Select View

Step 6: Navigate to the “Accounts” tab
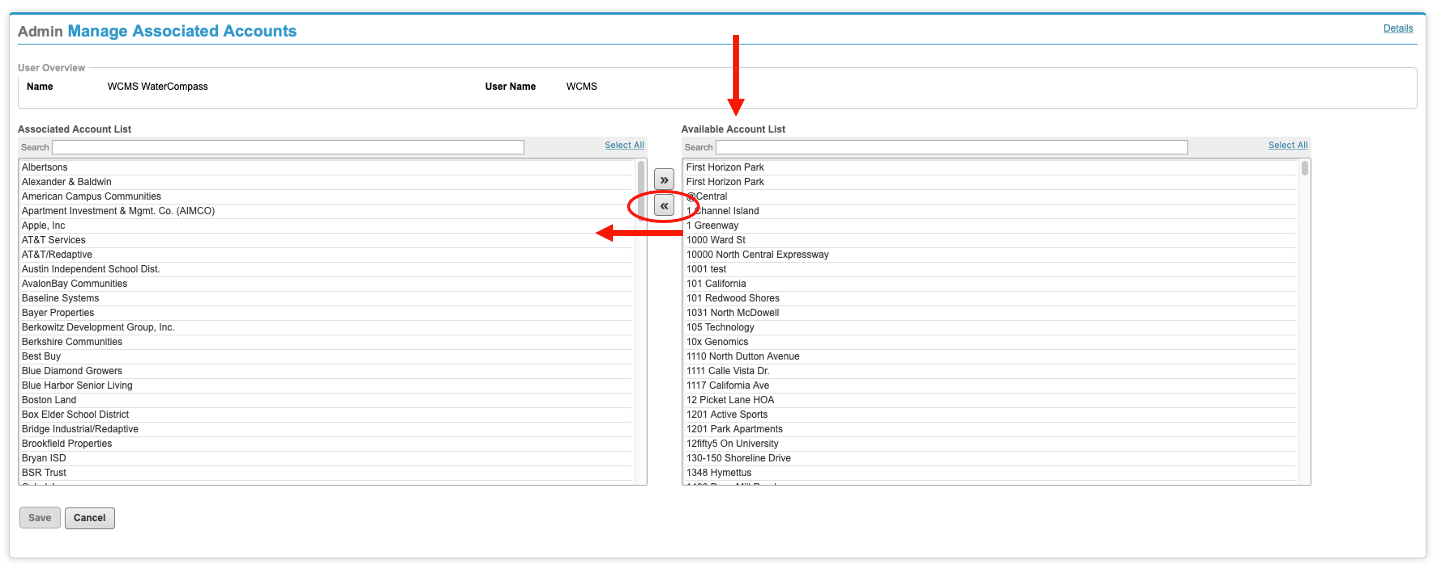
- Click “Manage Associated Accounts”
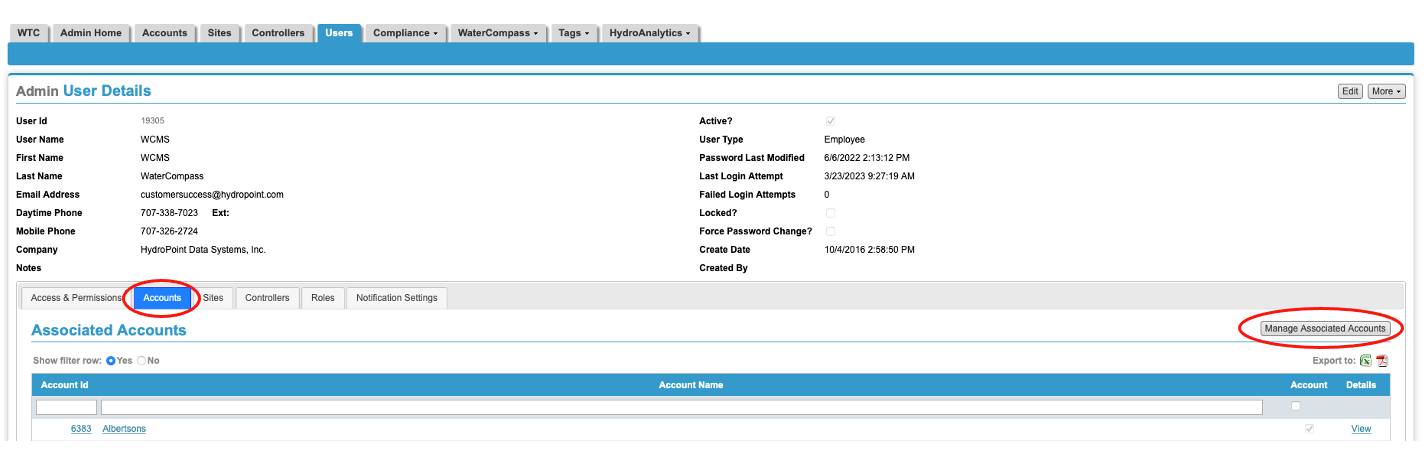
- Select the accounts that are associated with the user
User Permissions
Step 1: Set up User Permissions
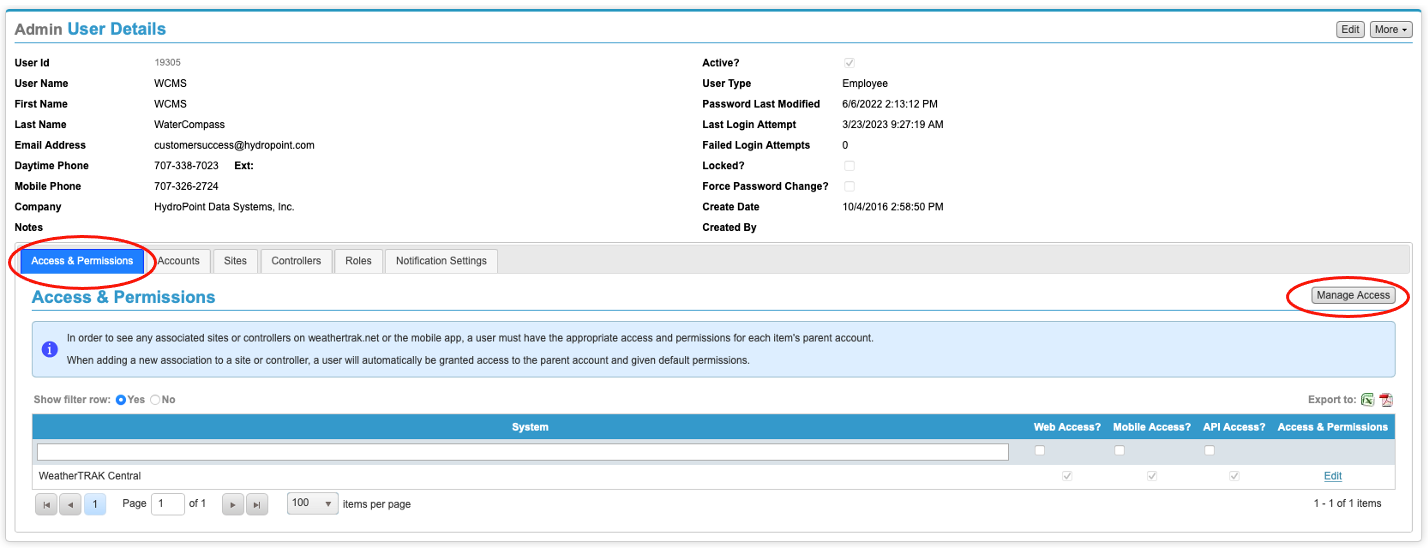
- Select the “Access and Permissions” tab
- Next to the account click “Edit”
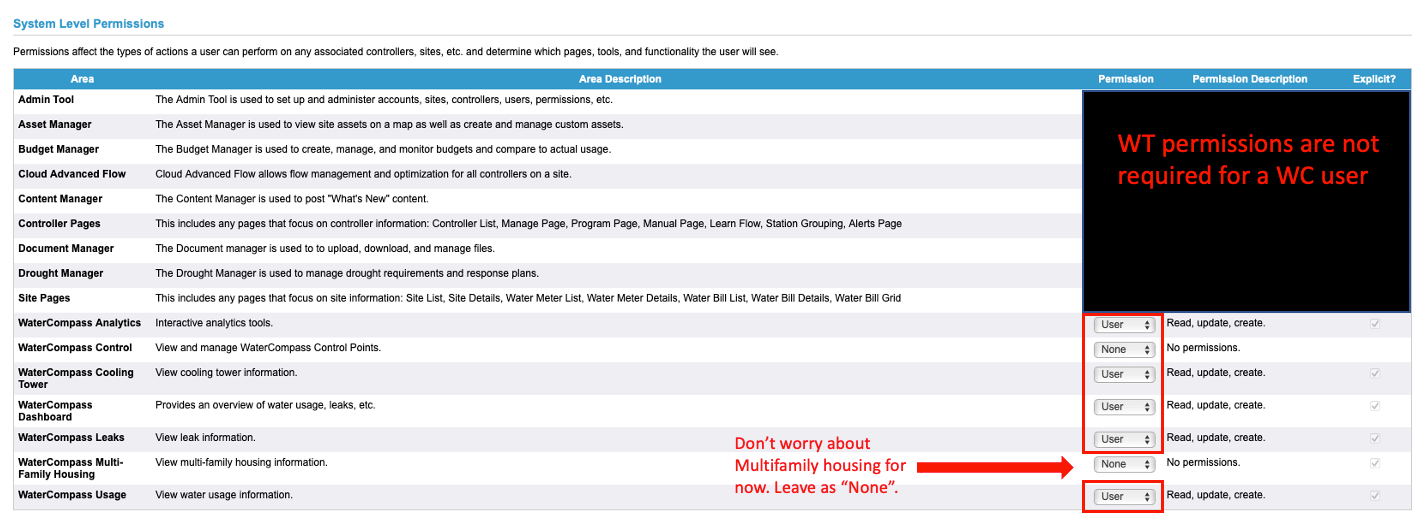
- Update the user permissions
- Assign “Reader” permission if they want site access but not alert notificaitons
- Assign “User” if they want both site access and alert notifications
Step 2: Send users their username and temporary password
- Navigate to the “User Details” page as described in Step 5
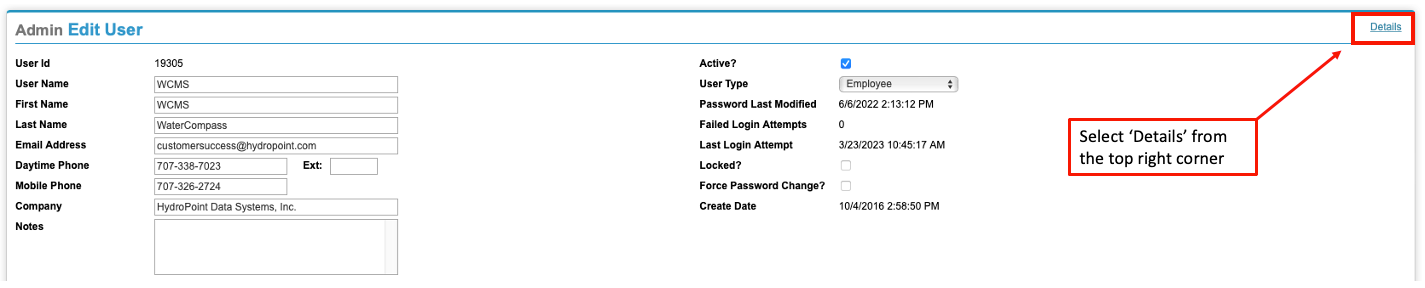
- Select “More” from the top right of the screen
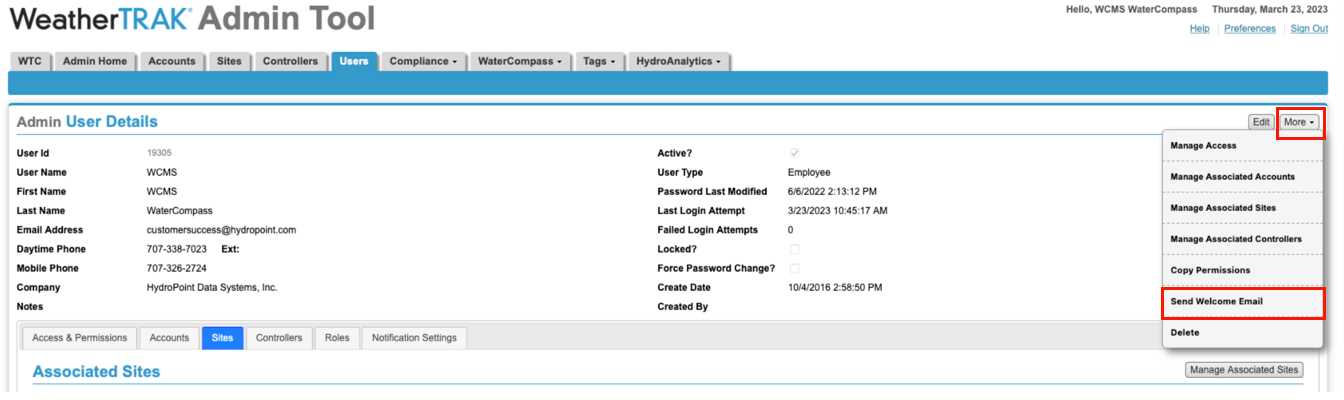
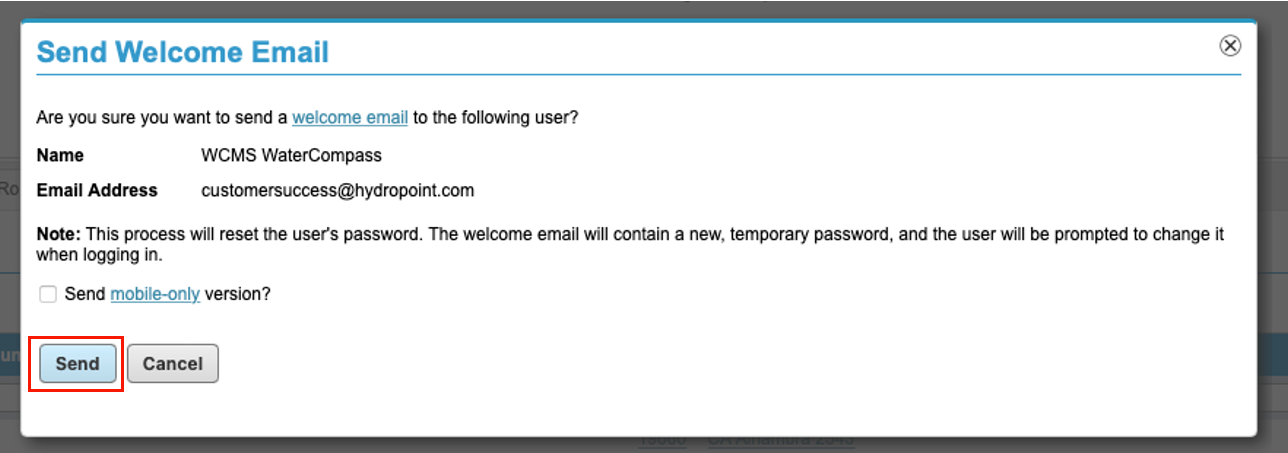
- A new “Send Welcome E-mail” window will pop up
- Make sure that the “send mobile-only version” is NOT checked
- Click “Send Welcome E-mail”
Site Group Setup
Step 1: Set up "Site Groups" for the user (If applicable)
- Navigate to the “Site Groups” tab
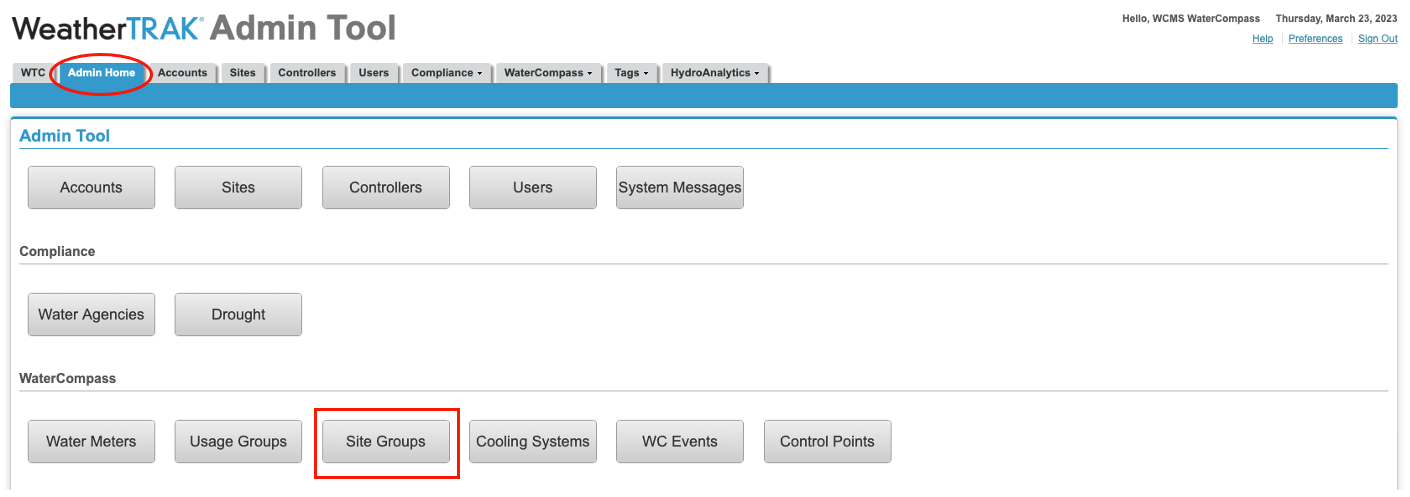
- Select “Add New Site Group”

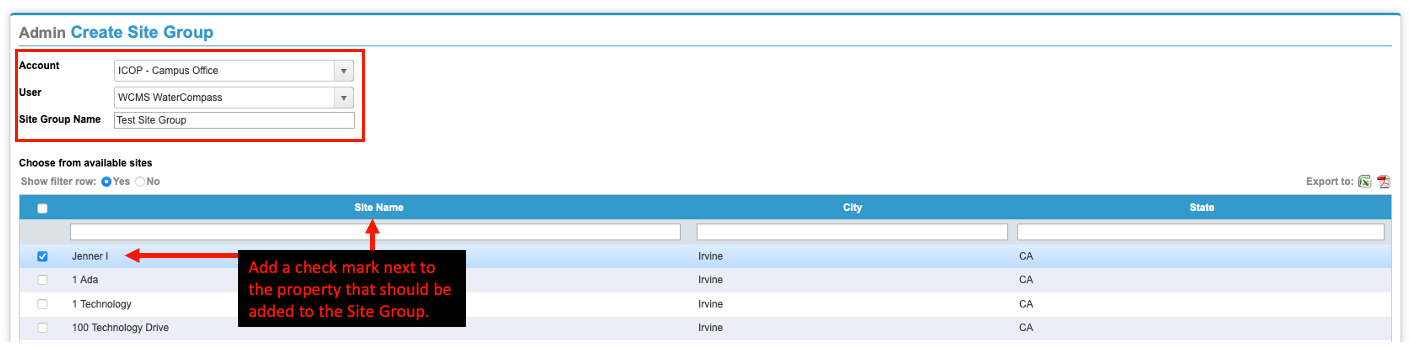
- Fill in the boxes and check the appropriate sites
Alert Notification Preferences
Prerequisite: User Access and Permissions
- Ensure the user has permissions to receive WaterCompass alert notifications.
Step 1: Login to WeatherTRAK.net Admin
- WeatherTRAK.net
- Login Credentials:
- Username: WCMS
- Password: Savewaternow
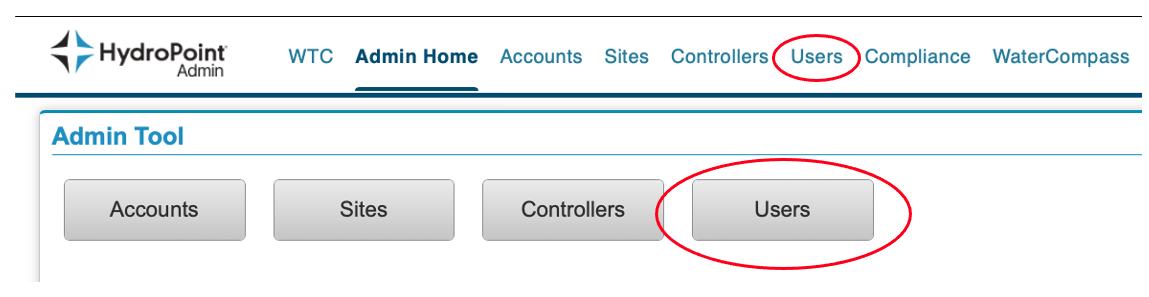
Step 2: Navigate to the User Tab
- There are 2 ways to navigate to the “Users” tab
- Select “Users” from the admin tool menu
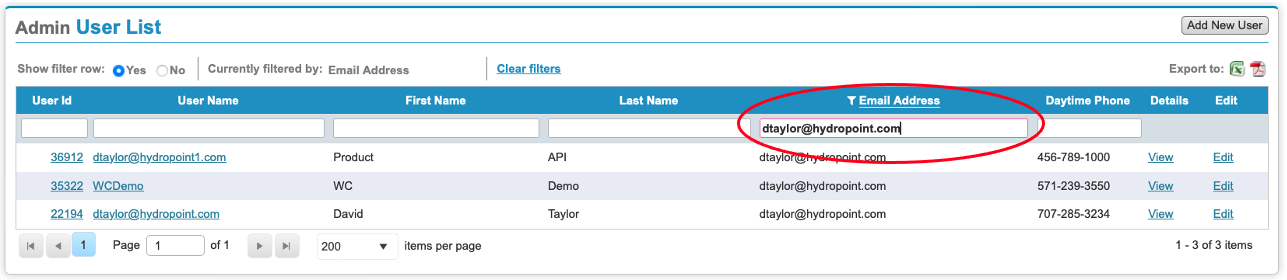
Step 3: Search for the User
- Please see instructions on how to Add a New User if the user does not already exist in the system.
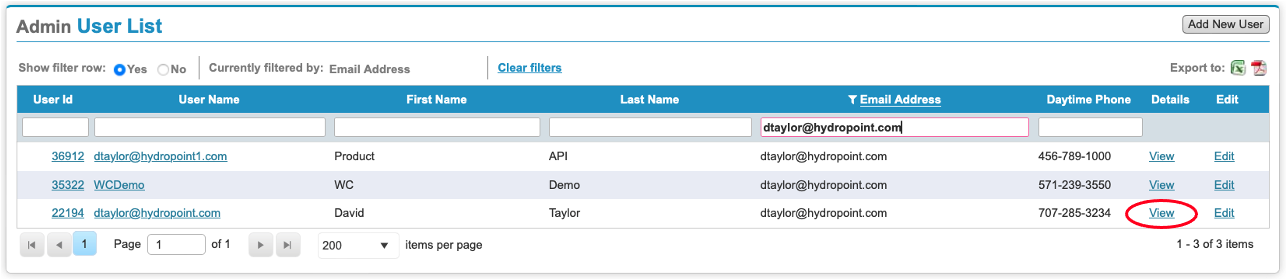
Step 4: Select View Details
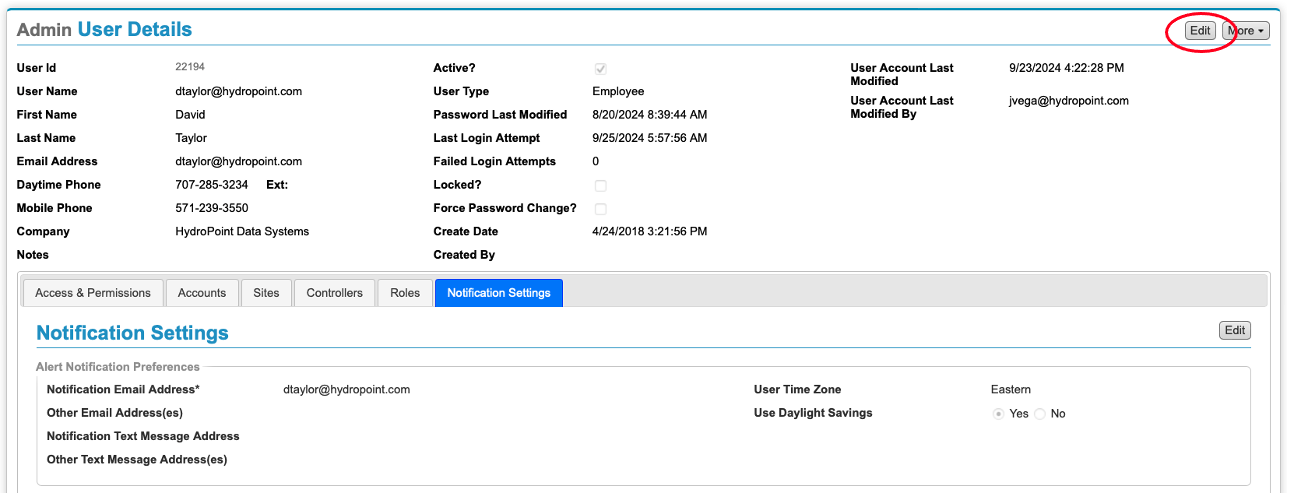
Step 5: Select the Notification Tab
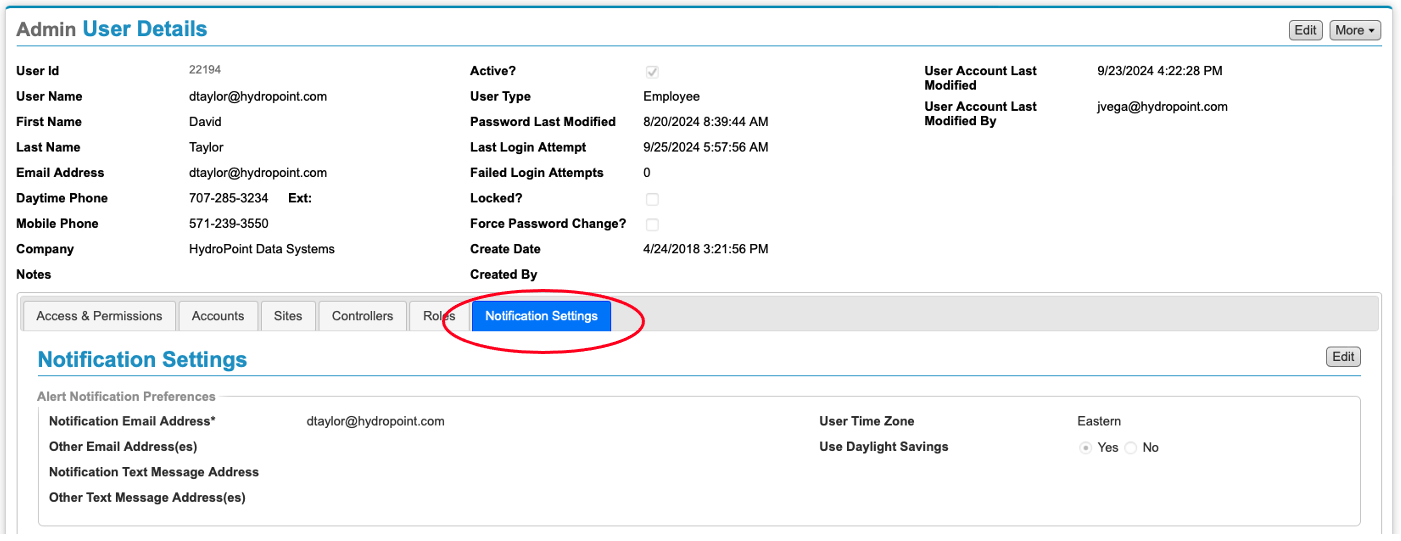
Step 6: Select Edit to update Notification preferences
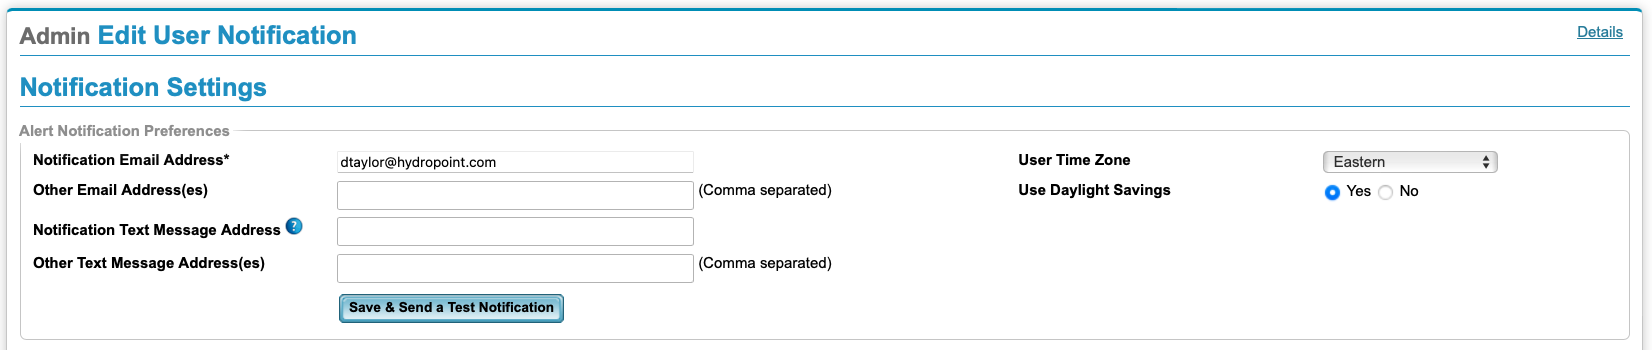
Step 7: Notification Settings
- Add or update the user's email address and phone number as needed.
- Adjust the user's time zone to ensure accurate alert delivery.
- Send test notifications to the user via email and text message to confirm settings.
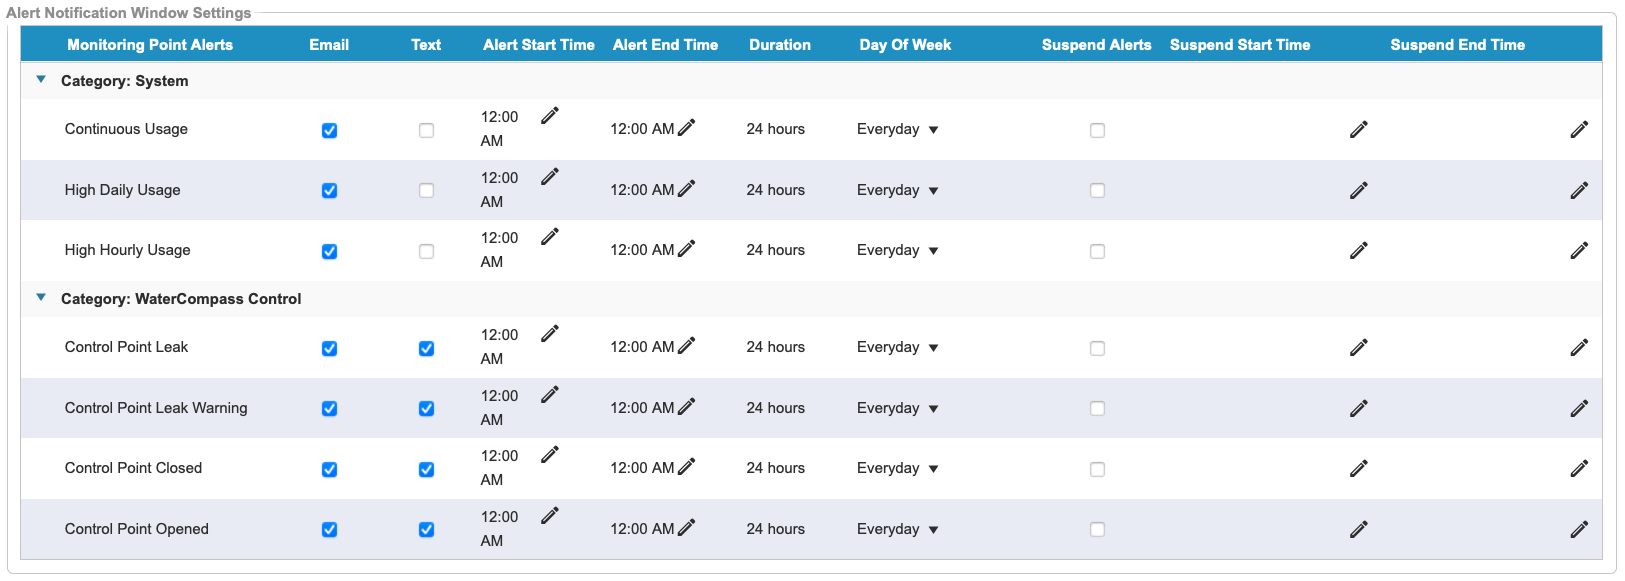
Step 8: Alert Notification Window
- Select the types of notifications the user wishes to receive, including usage and control alerts.
- Opt into email and text message notifications based on user preferences.
- Set delivery hours for email and text message notifications.
- Schedule the specific days of the week for receiving notifications.
- Temporarily suspend alerts for a defined period if needed.
Step 9: Monitoring Point Notification Settings
- Suspend alerts for individual monitoring devices as needed.
- Pause alerts either indefinitely or for a specified period.
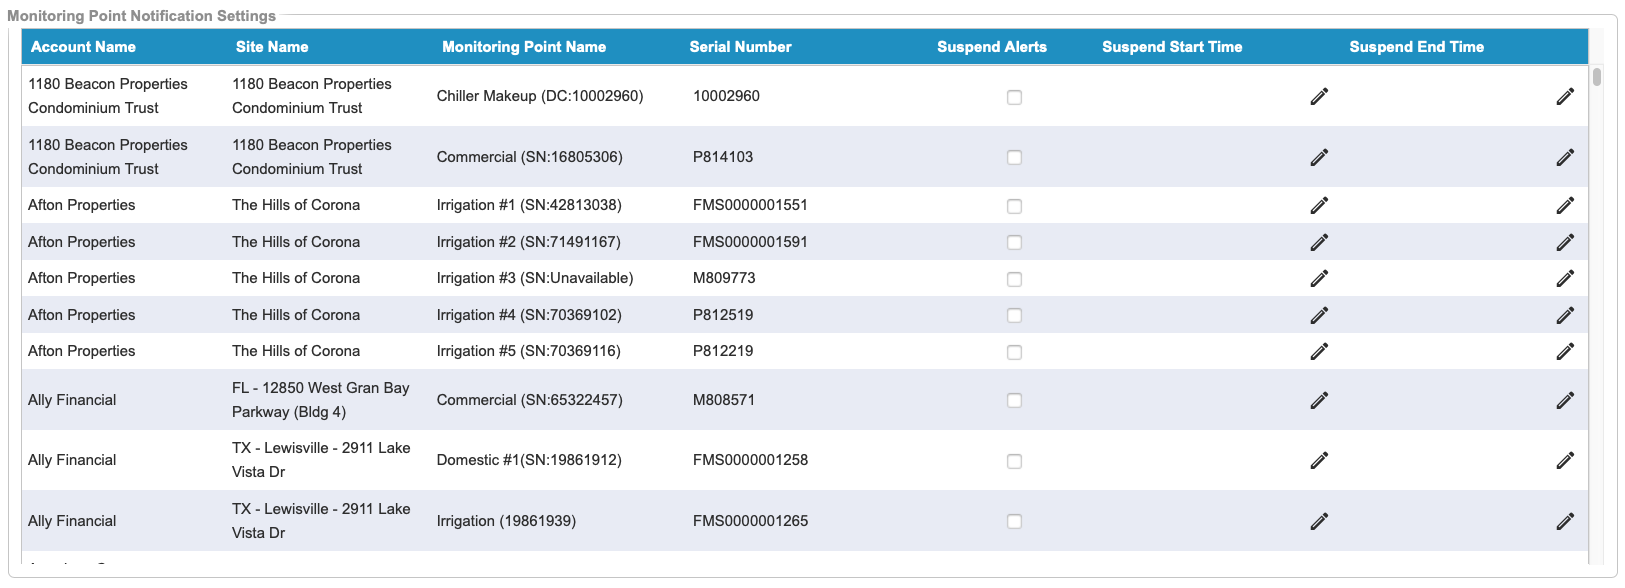
Image Caption
© Copyright 2024 HydroPoint Data Systems, Inc. All rights reserved. HydroPoint, the HydroPoint logo, and WaterCompass are either registered trademarks or trademarks of HydroPoint, Inc. Other trademarks may be held by their respective owners.